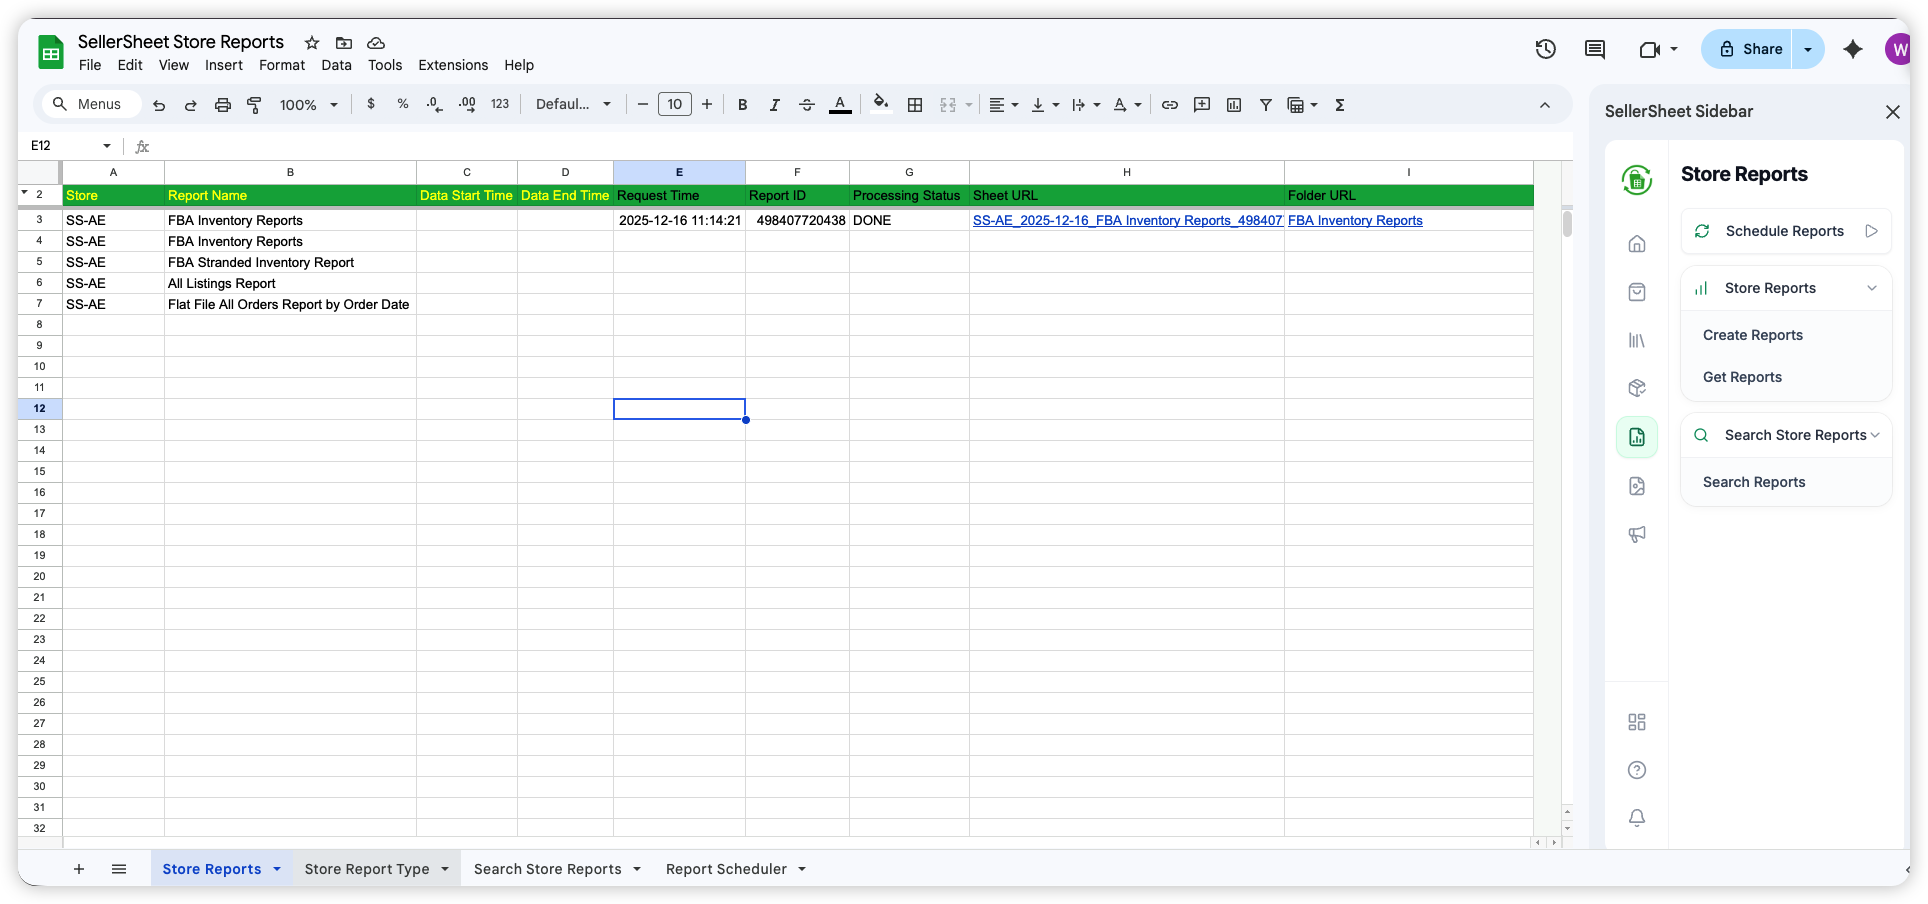
 Continue with Google
 SellerSheet Documentation
Seamlessly synchronize Amazon Seller Central data with Google Sheets.
SellerSheet connects directly to Amazon's SP-API and Ads API, enabling automated data retrieval, analysis, and management within the familiar Google Sheets interface.
Dashboard Authorization
Use the SellerSheet Dashboard to securely authorize your Amazon Stores. This is where you connect your Seller Central account so SellerSheet can fetch your data.
Sidebar Installation
Install the SellerSheet Sidebar from the Workspace Marketplace. This adds the SellerSheet sidebar to your spreadsheets.
This documentation outlines the setup process, authentication workflows, and module-specific functionalities.
Sidebar Path
Open the sidebar in Google Sheets and click buttons to sync data. Best for daily operations — no coding required.
How the sidebar works →AI Agents (MCP)
Connect Claude, Cursor, Coze, Codex, OpenClaw, or any MCP-compatible AI tool. Type in plain language — the agent handles multi-step tasks and writes results directly to your sheets.
Set up AI agents →Prerequisites
- Active Amazon Professional Seller Account
- Google Account (Workspace or Personal)
- Chrome Browser (Recommended)
Quick Start Guide
SellerSheet seamlessly synchronizes your Amazon Seller Central data with Google Sheets. Features include automated order syncing, comprehensive business reports, multi-store support, and simple team sharing.
1. Account Creation
Access the SellerSheet Portal to create your account.
- New Users: Click Continue with Google to create your account.
- Returning Users: Can also use Continue with Email to login via OTP.
- Use the same Google Account you use for Google Sheets.
- You will be redirected to the Dashboard upon success.
2. Store Authentication
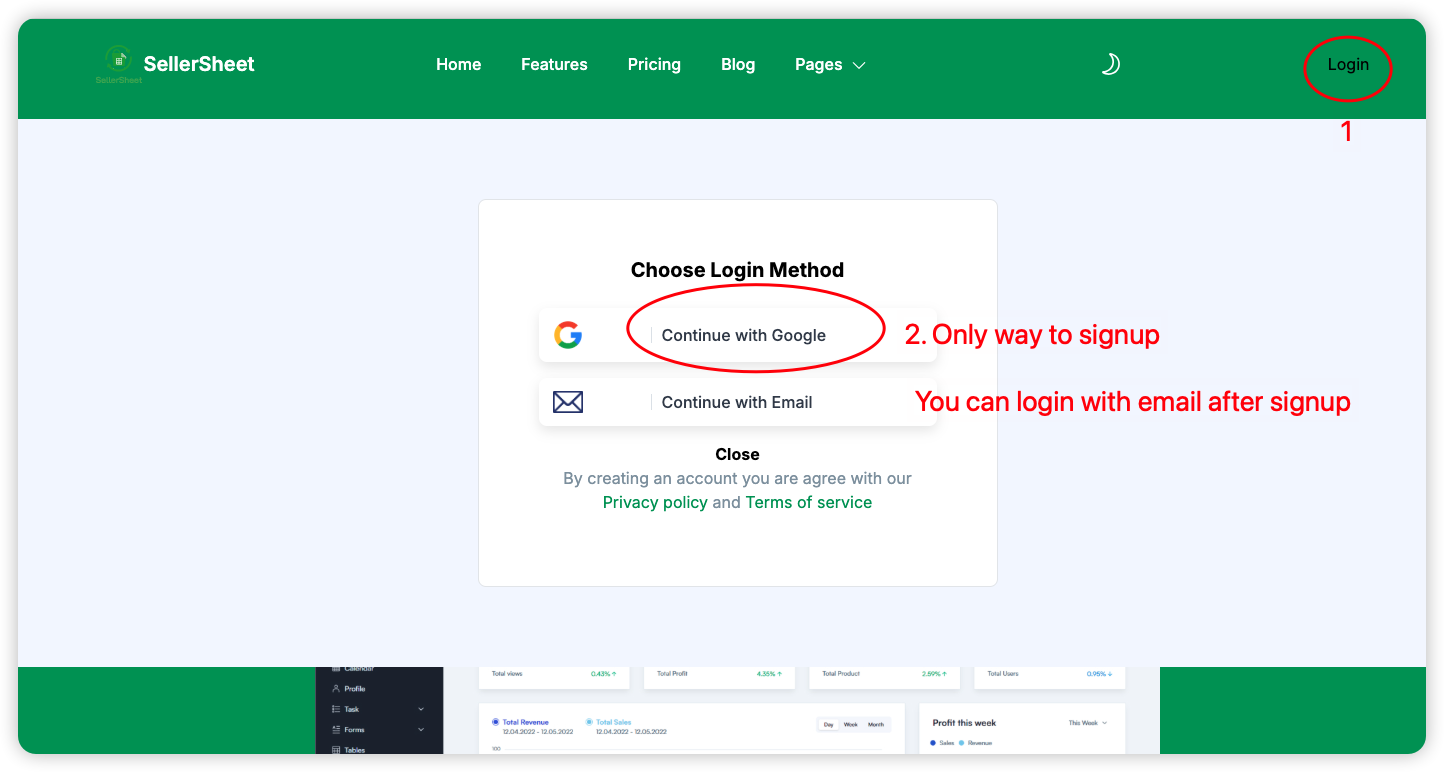
2.1 Authorize Amazon Store
- Navigate to the Dashboard.
- Click the Add Store button.
- Enter a friendly Store Name (e.g., "MyStore").
- Select the Region. Important: Ensure the region matches your Amazon Seller Central account.
- Click Authorize Store to be redirected to Amazon for approval.
How your Store Name is used in sheets
SellerSheet identifies your store using a Store Identifier that combines your store name with the country code of your marketplace:
StoreName-CountryCode
For example, if you named your store "Bam-Bam-Shop" and selected Canada (CA), your store identifier is Bam-Bam-Shop-CA.
Sheets that connect to Amazon (such as Create Listings and Draft Listings) require you to type this identifier exactly into a designated cell (e.g. cell A2 or B1). If it doesn't match, you'll see a "Store not found" error. See how sheets use the store identifier →
[ Placeholder: Store name → sheet identifier diagram ]
Replace with: ./assets/images/guide/store-identifier-explainer.png
2.2 Authorize Advertising
- Once the store is listed, click Authorize Ads.
- Click Confirm to be redirected to Amazon Ads.
- Click Allow on the Amazon page.
- You will be redirected back. The ADS AUTH column will show the authorization date.
2.3 Team Access
- Click the Share button.
- Input the email address and click Share Store.
- Current Access lists existing users; Shared to confirms the new addition.
3. Sidebar Installation
- Go to the Google Workspace Marketplace Listing.
- Click Install (or "Admin Install" for Workspace domains).
- Follow the prompts to grant permission to your Google Account.
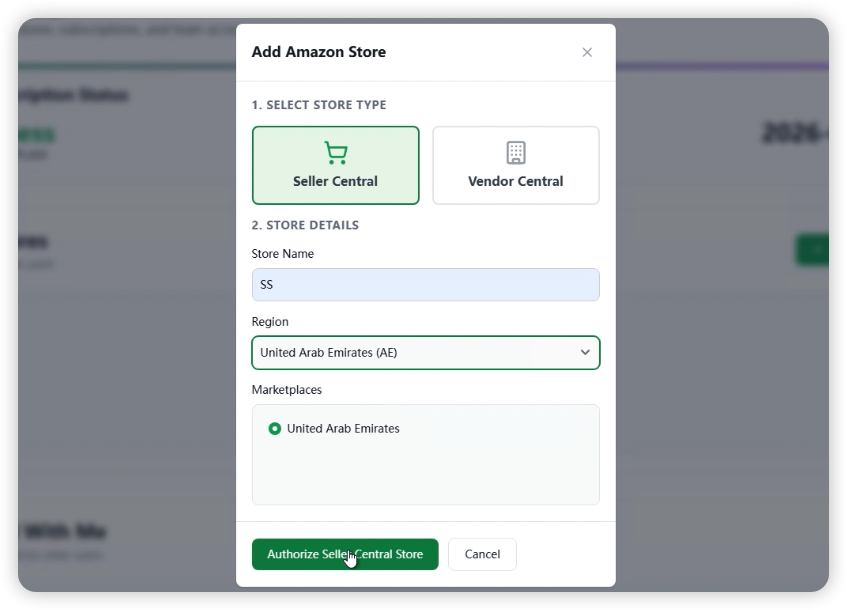
- Open a new Google Sheet (or type
sheet.new). - Go to Extensions → SellerSheet → Open Sidebar.
- The add-on will initialize and create the "SellerSheet" folder structure in your Drive.
4. Sync Orders
Verify your setup by retrieving your first batch of data.
- In the Sidebar, expand the Sales tab.
- Click the Sync Orders button.
- The Orders sheet in the "SellerSheet Sales" spreadsheet will populate with your recent 30 days of orders.
How SellerSheet Sidebar works
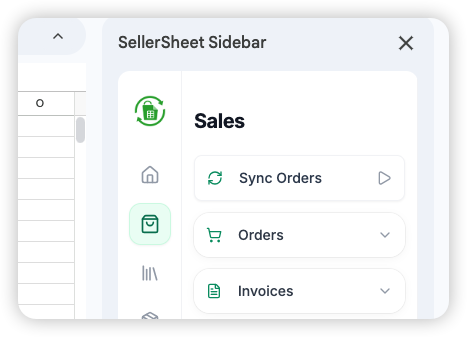
SellerSheet works through a sidebar inside Google Sheets. The sidebar is organized as three workspaces — Sellers, Vendors, and Ads — with an icon rail of feature areas down the left side. Pick a workspace, pick a feature, and its panel shows everything that feature can do. Five ideas explain the whole sidebar.
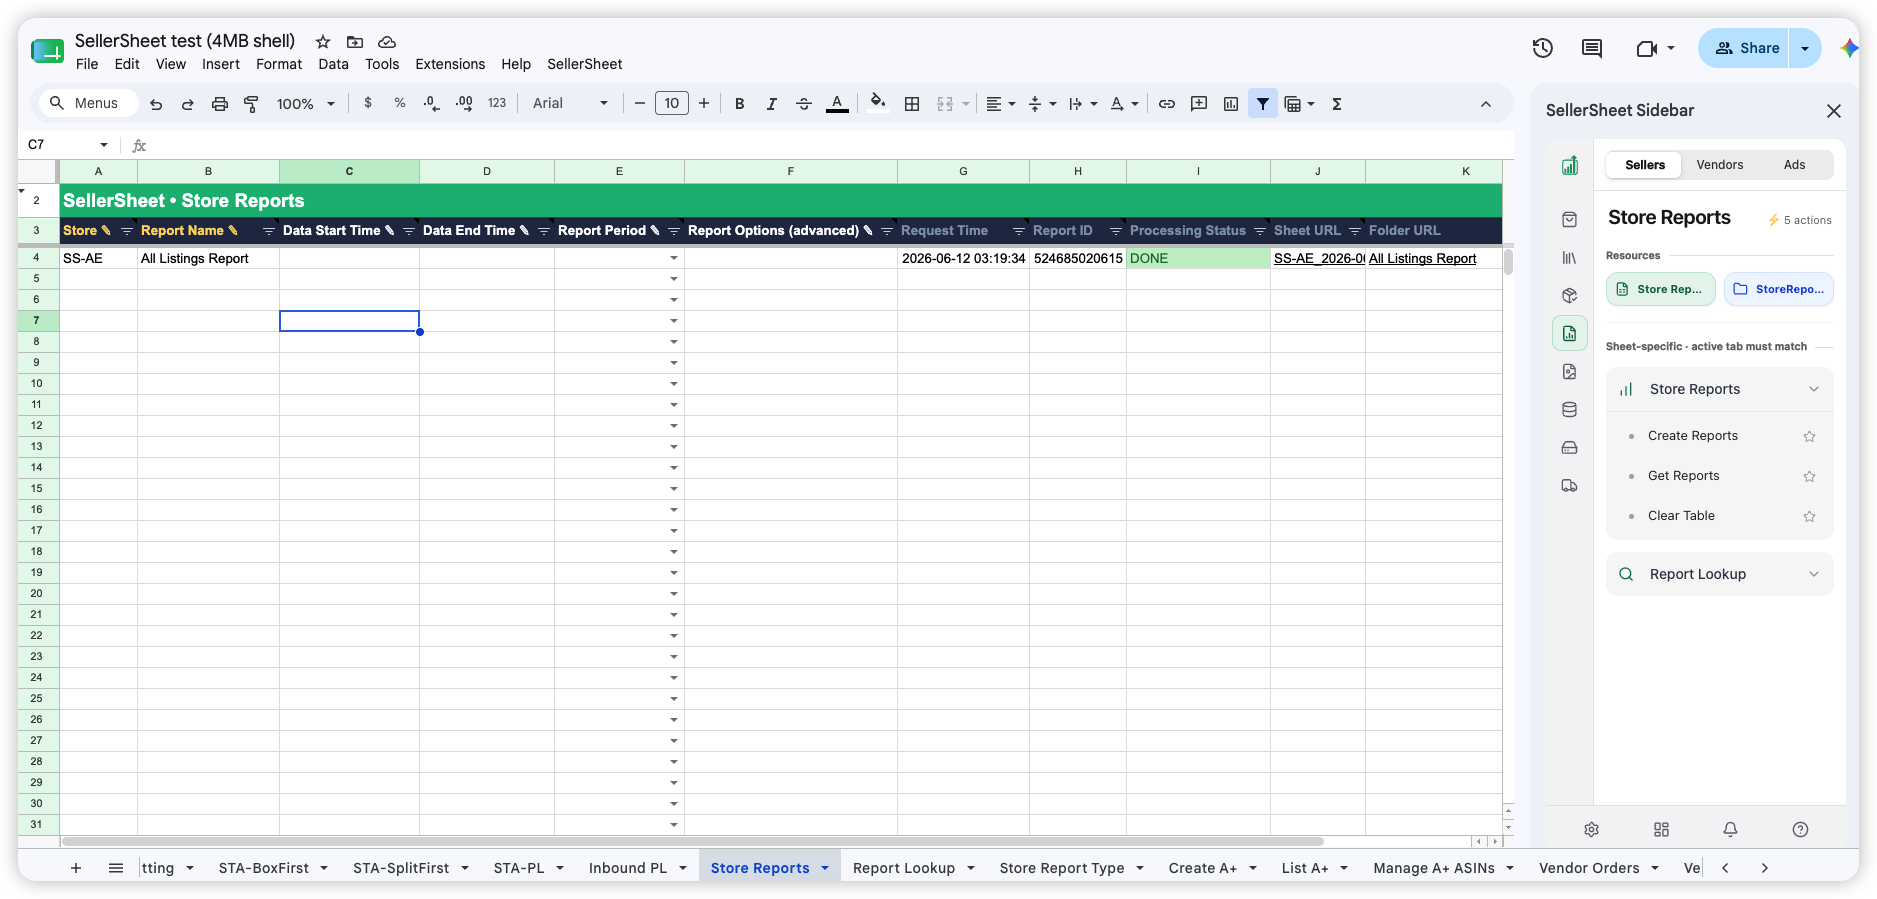
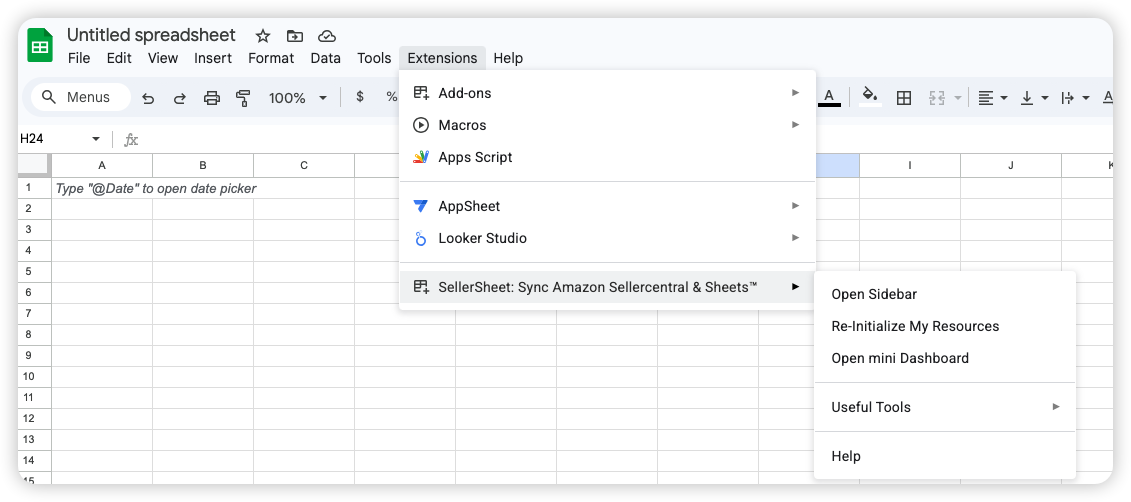
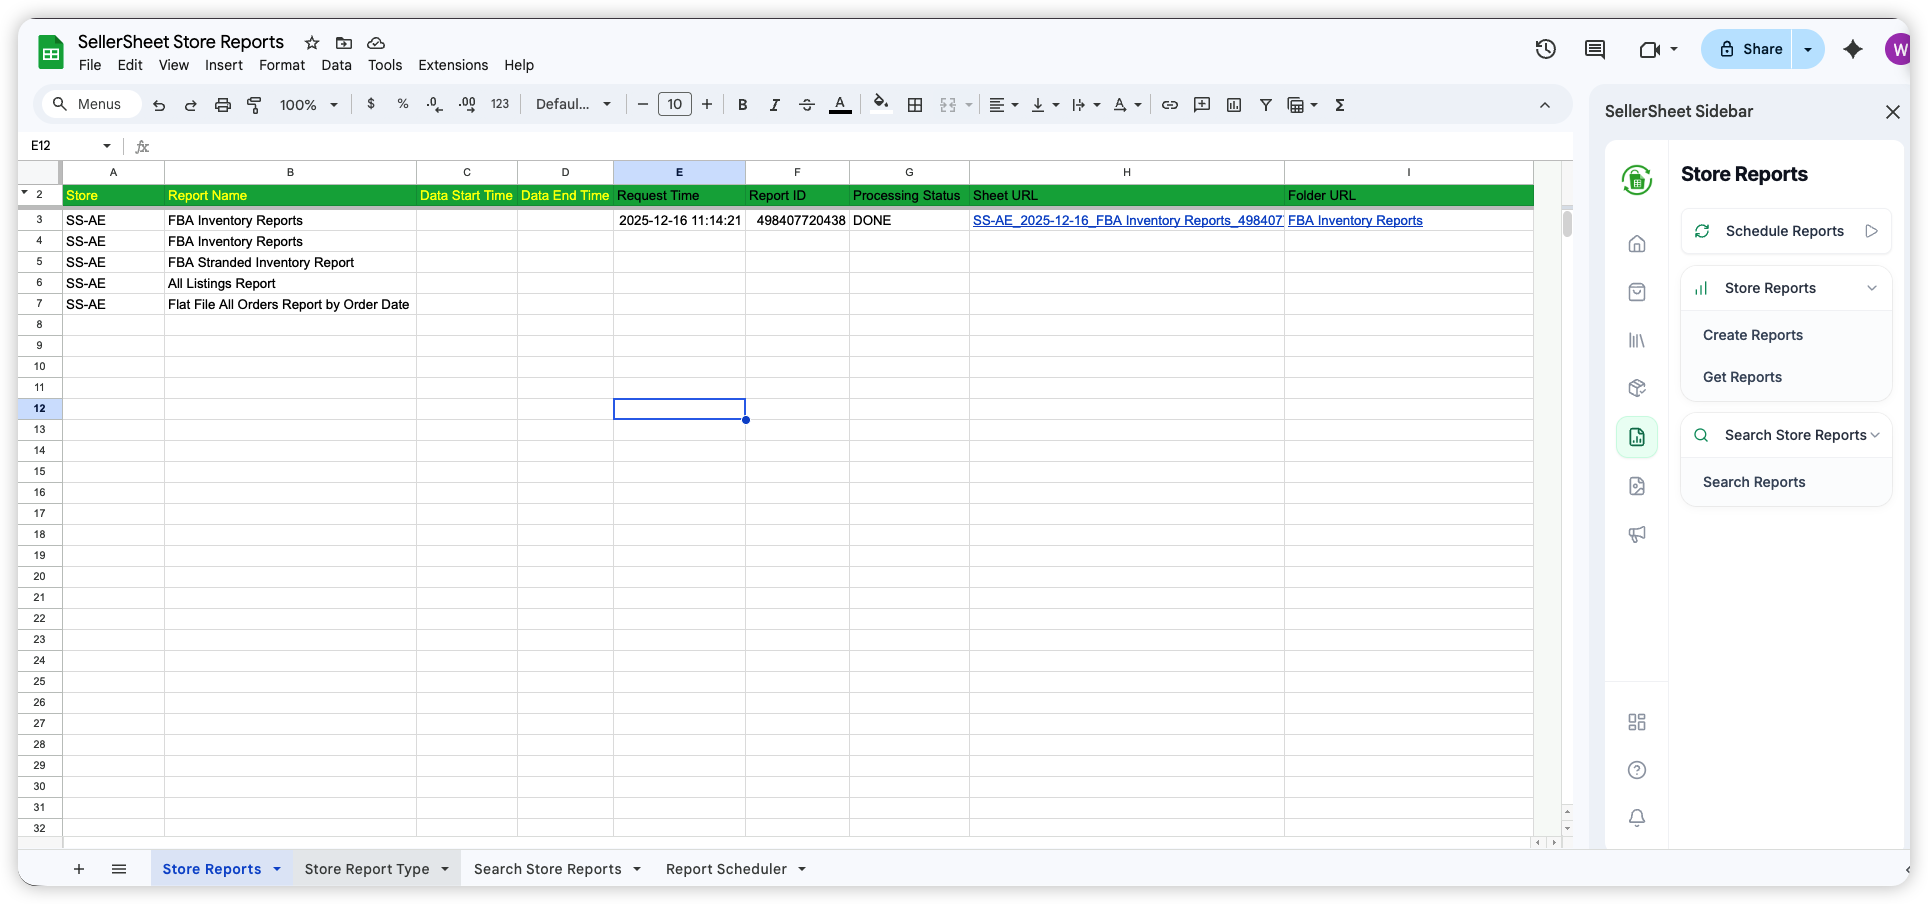
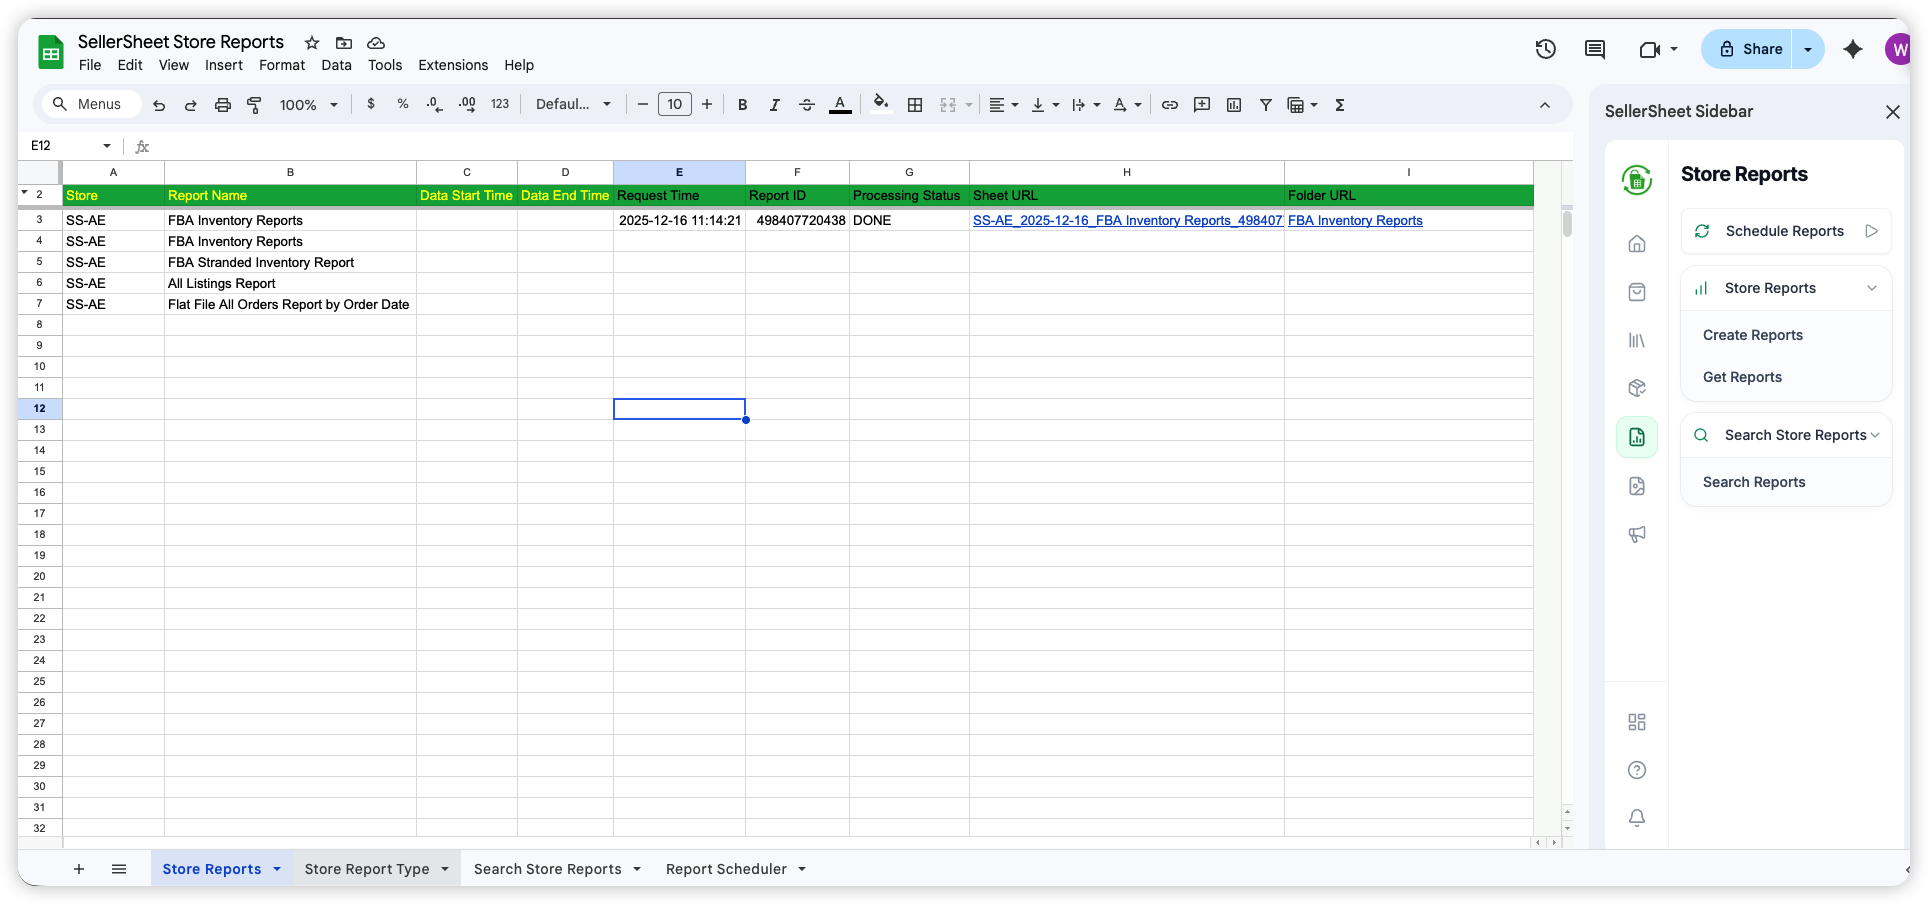
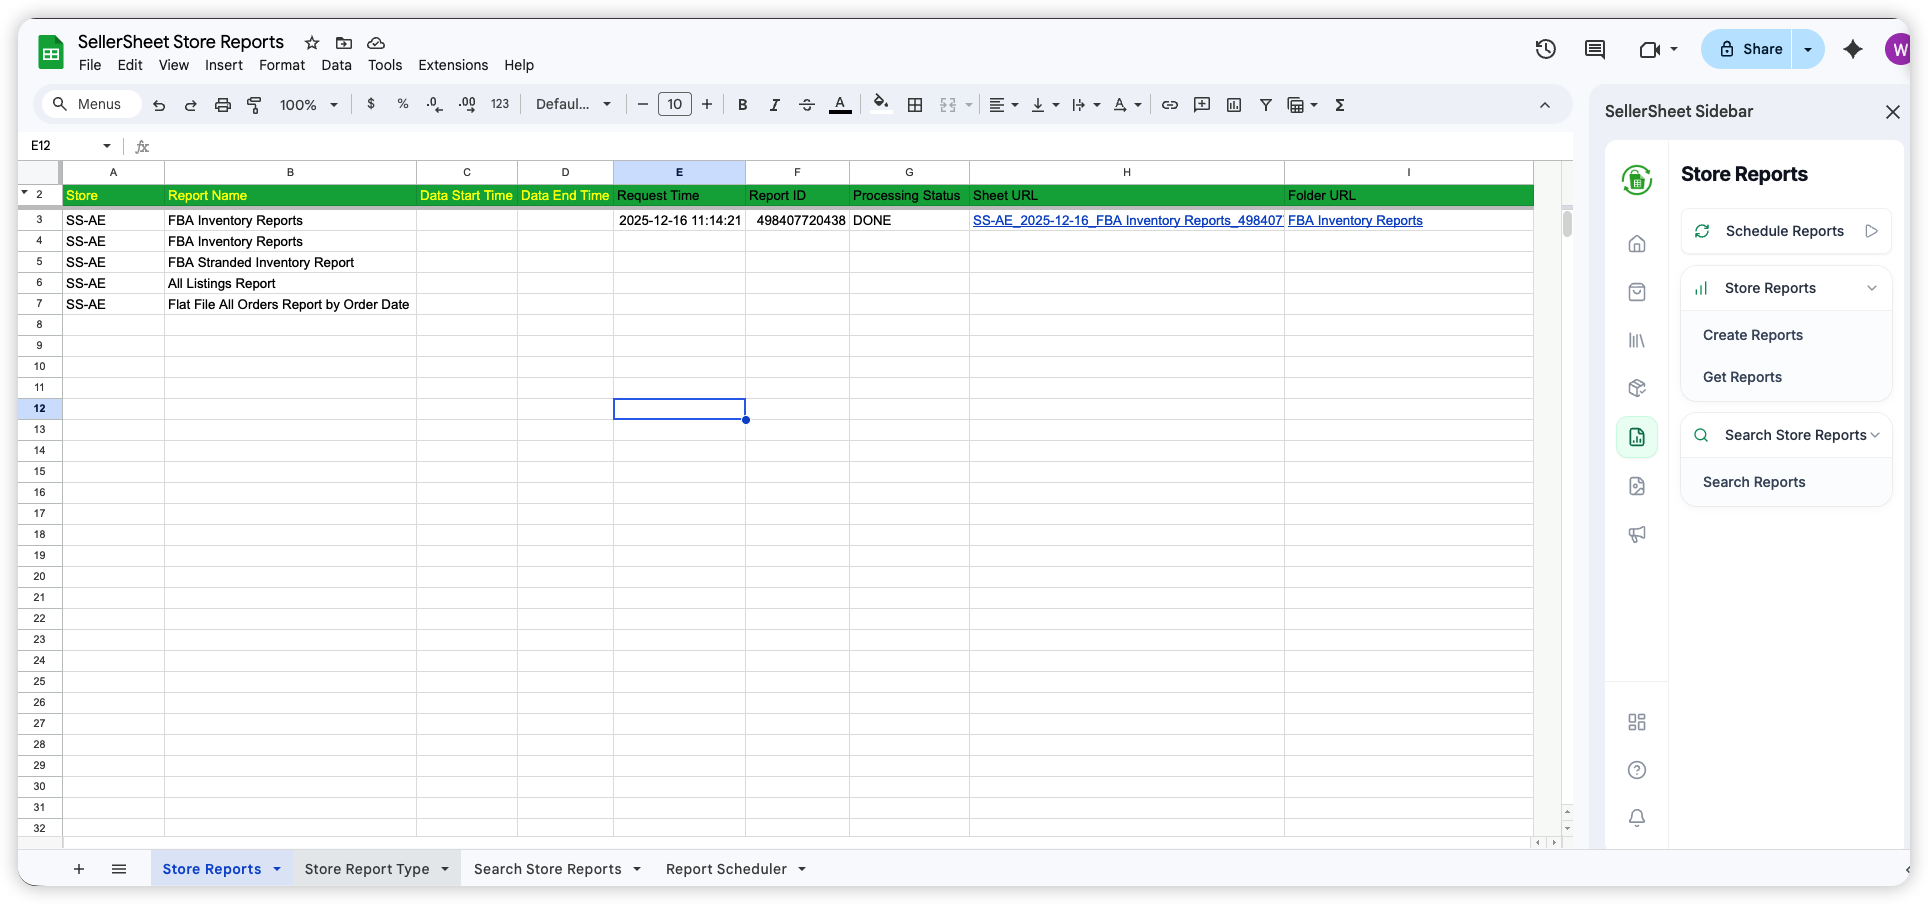
The Store Reports panel in the Sellers workspace. Left to right: the template sheet with ✎ input columns and auto-filled status columns, the icon rail, the panel with Resources links and its sheet-specific action groups.
1 Pick a Workspace, Then a Feature
The tabs at the top switch between three workspaces: Sellers (Sales, Catalogs, FBA, Shipments, Store Reports, A+ Content, Data Kiosk), Vendors (Vendor Orders), and Ads (Sponsored Products, Sponsored Brands, Sponsored Display, Ads Reports). The icon rail down the left side lists the feature areas of the active workspace — click one to open its panel.
Each panel shows an action count (e.g. ⚡ 5 actions) so you can see at a glance how much it does. Star any action to pin it to your favorites. The bar at the bottom of the sidebar holds Settings, Dashboard, Notifications, and Documentation.
2 Resources — Jump Straight to Your Files
At the top of each panel, Resources gives quick-access links to that feature's files: the green button opens its spreadsheet, the blue button opens its Drive folder.
For example, the Store Reports panel links to the Store Reports spreadsheet and the StoreReports Drive folder where downloaded reports land. The Resources section is hidden when no files are configured yet.
3 Two Kinds of Actions — Read the Section Label
Actions are grouped under two labels. "Global · works on any sheet" actions run from anywhere — no need to navigate first (e.g. Sync Orders fetches the latest orders and distributes them across all relevant sheets). "Sheet-specific · active tab must match" groups are named after sheet tabs in the spreadsheet — you must be on that sheet tab before clicking.
Sheet missing? If the expected sheet tab doesn't exist in your spreadsheet, click Re-Initiate Resources in the sidebar — it recreates any missing template sheets automatically.
4 Reading a Template Sheet — Fill the ✎ Columns
Every template sheet follows the same anatomy: a green title band (e.g. SellerSheet · Store Reports), a dark header row, and one row per request. The header marks tell you exactly what's yours to fill:
| Header Mark | Meaning | What You Do |
|---|---|---|
| ✎ pencil | Your input | Fill it in — e.g. Store ✎, Report Name ✎. Many input cells offer a dropdown of valid values; hover the header for a note explaining what it expects. |
| no mark | Auto-filled | Don't touch — SellerSheet writes these after you run an action: Request Time, Report ID, Processing Status, Sheet URL, Folder URL. |
Quick Tip: watch the Processing Status column — it updates in place (e.g. DONE), and the result links land in the URL columns of the same row.
5 Entering Your Store Identifier
Every action that talks to Amazon needs to know which store to use. On most templates the first column is Store ✎ — type your Store Identifier there on each row (different rows can even target different stores). A few older sheets take it in a designated cell such as A2 instead.
The Store Identifier is formed by combining the Store Name you chose in the Dashboard with the country code of your marketplace, separated by a hyphen:
Example
Store Name in Dashboard: Bam-Bam-Shop
Marketplace: Canada (CA)
→ Type into the Store ✎ column: Bam-Bam-Shop-CA
Getting a "Store not found" error? The identifier in the cell doesn't match any store in your account. Check the exact spelling and country code in your Dashboard. Country codes: US, CA, GB, DE, FR, IT, ES, JP, AU, AE, IN, MX, BR, SG, NL, SE, PL, TR, BE, EG, SA, ZA.
[ Placeholder: Dashboard store name → Store ✎ column ]
Replace with: ./assets/images/guide/general/store-identifier-in-sheet.png
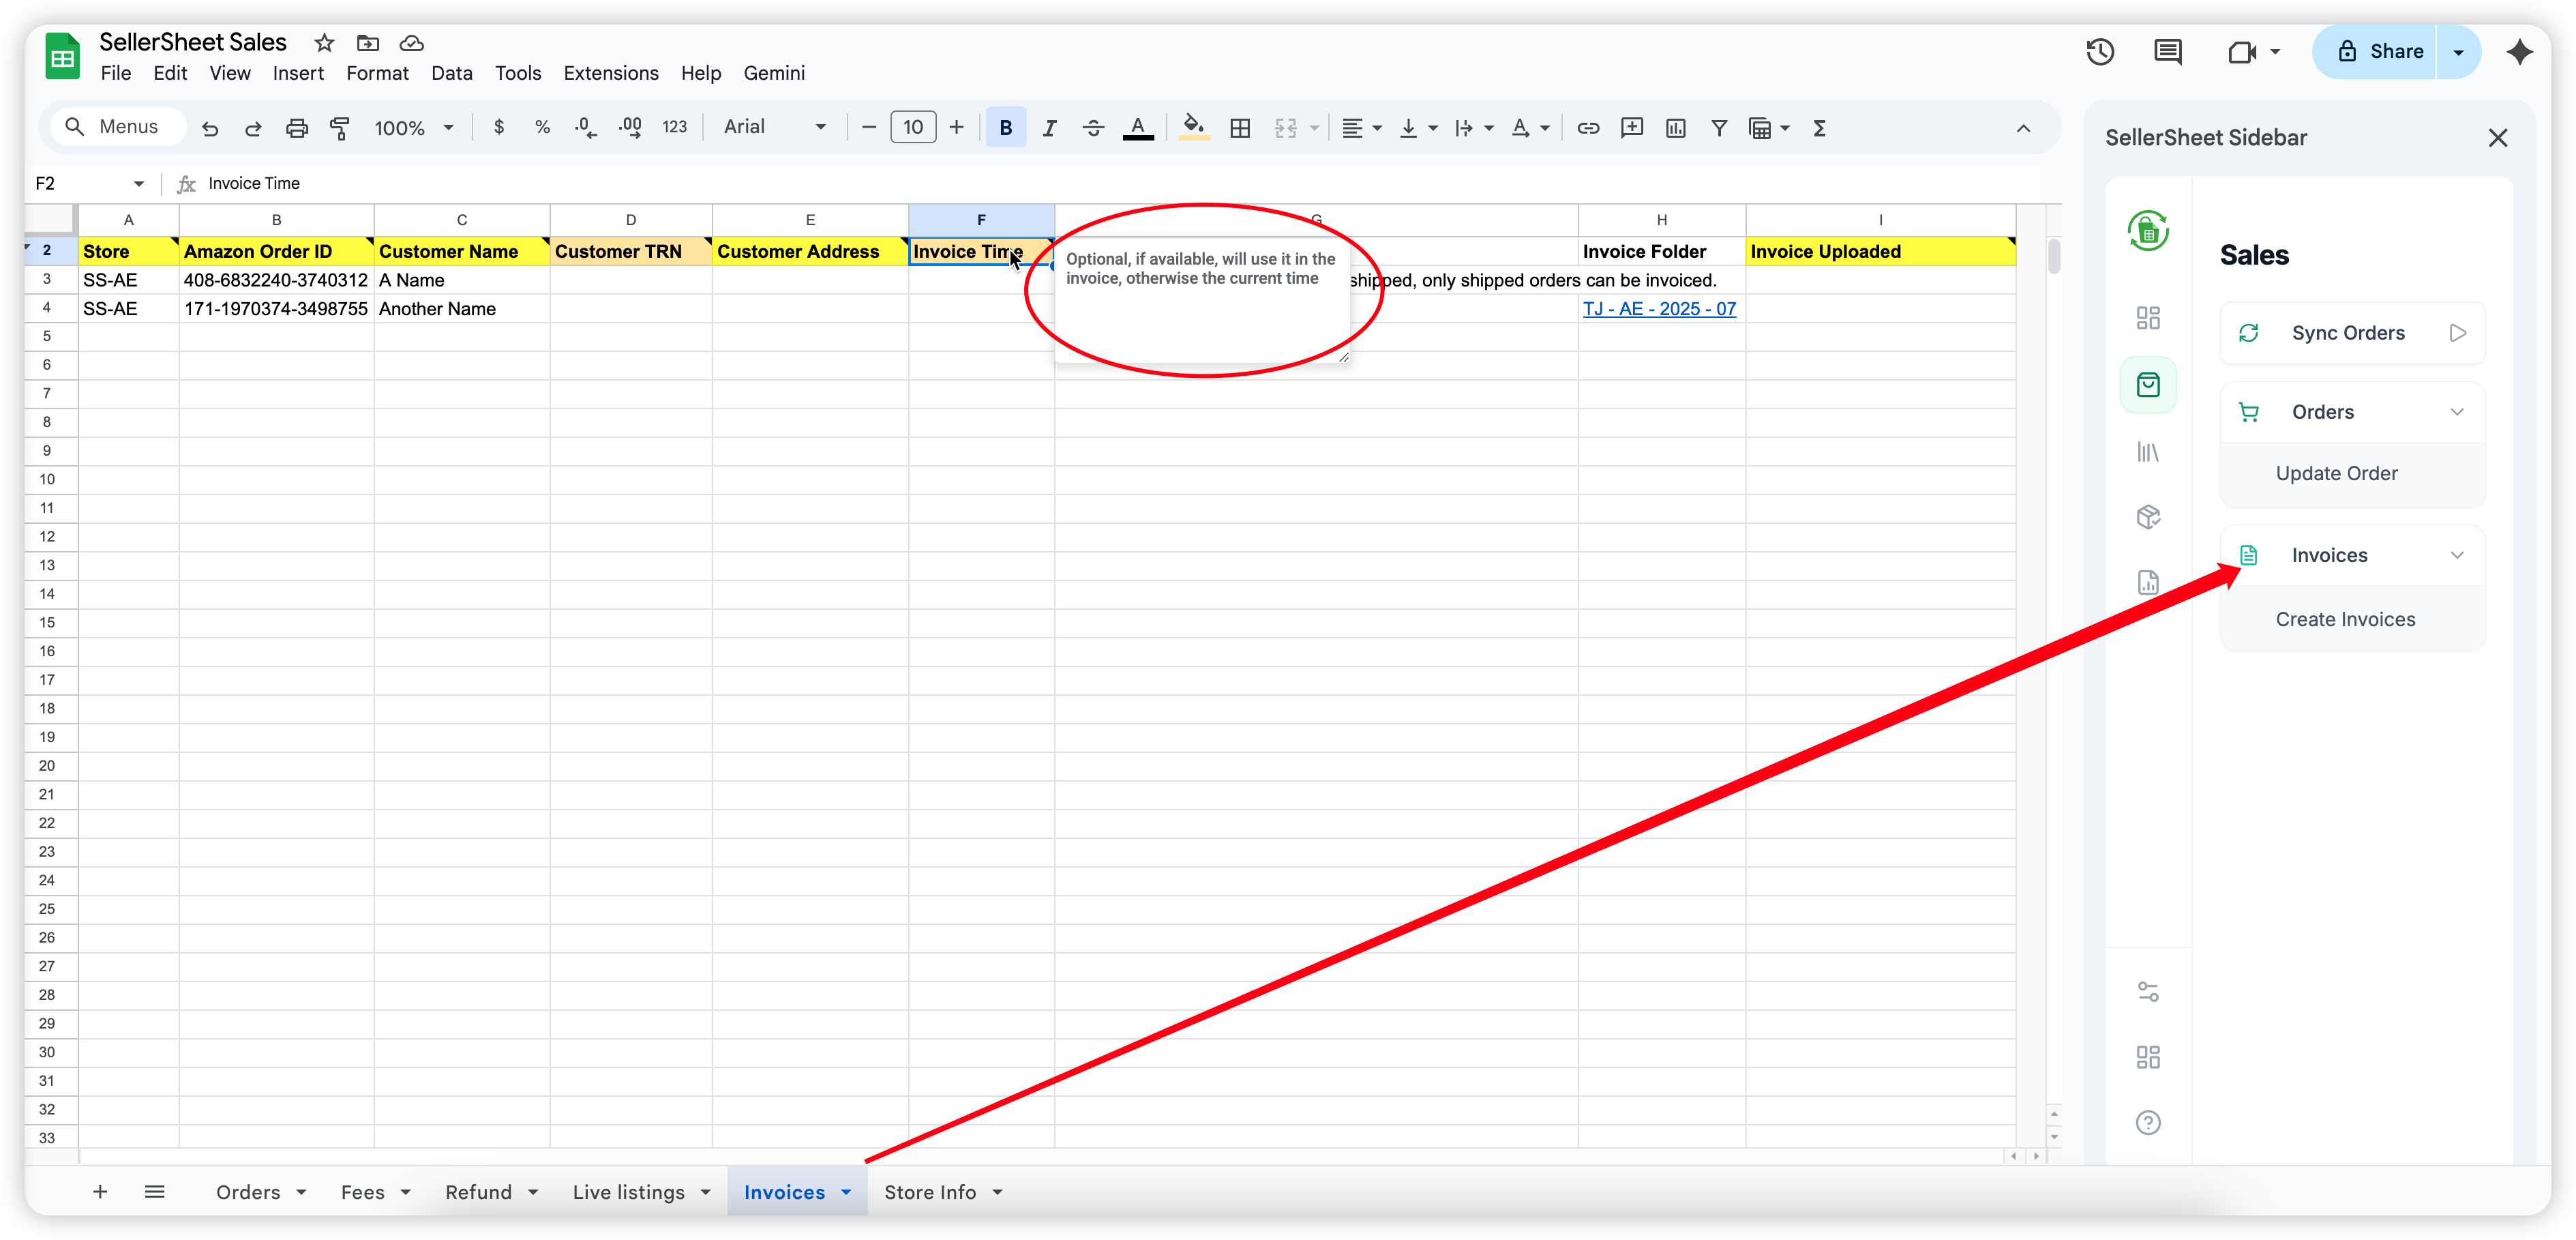
Putting It All Together
Want an Amazon report? Here's the pattern:
- 1In the Sellers workspace, click Store Reports on the icon rail, then the green Resources link to open its spreadsheet.
- 2Switch to the Store Reports sheet tab — the action group with the same name needs it active.
- 3Fill the ✎ columns on a row: Store (e.g.
SS-AE), Report Name, and any optional dates via the dropdowns. - 4In the sidebar, click Create Reports — Request Time, Report ID and Status fill themselves. When Status shows DONE, click Get Reports and the result links land in the same row.
The same pattern runs every feature — pick the workspace and panel, open Resources, match the sheet tab, fill the ✎ columns, click the action, and read the auto-filled status on your row.
Home Tab
The Home Tab is your central base in the sidebar. It hosts your essential tools and provides quick access to everything SellerSheet has created for you.
Documentation
Click this to open this guide. Useful for new users to get started quickly.
Mini Dashboard
Your cockpit for account management. Opening the Mini Dashboard allows you to monitor:
- Subscription: Check your current plan and expiry.
- API Quotas: Real-time tracking of your SP-API and Ads API usage.
- Stores: Secondary view of your owned and shared stores.
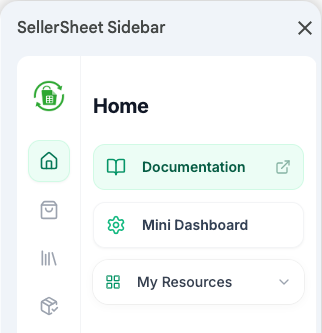
Home Tab Main Overview
My Resources
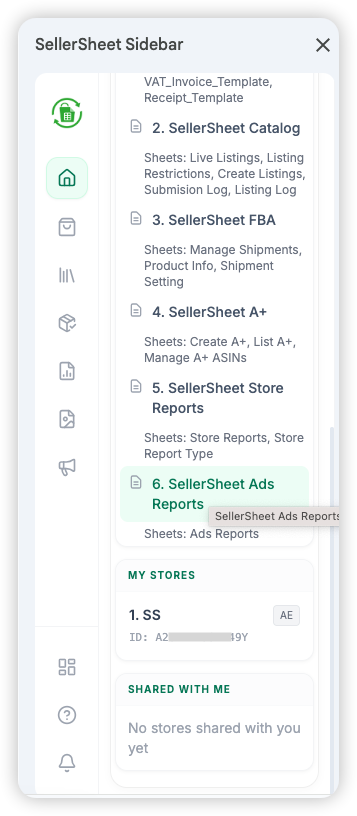
The My Resources panel in the Home tab shows everything SellerSheet has created for you — folders, spreadsheets, and connected stores. It's also your safety net: if anything goes missing, this is where you fix it.
What SellerSheet Creates
When you first open the sidebar, SellerSheet builds a SellerSheet folder in your Google Drive containing:
- Folders: Organized storage for Invoices, Reports, Images, etc.
- Spreadsheets: Pre-built templates for Sales, Catalog, Store Reports, FBA, A+, etc. Each spreadsheet contains multiple sheets (tabs) for sub-features.
- My Stores: Stores you authorized on the SellerSheet Dashboard.
- Shared With Me: Stores other team members have shared with you.
How SellerSheet Tracks Resources
SellerSheet remembers each folder and spreadsheet by its ID. If the resource still exists, SellerSheet keeps using it. If it's been deleted or can't be found, SellerSheet creates a new one and remembers the new ID going forward.
This means you can safely delete, rename, or reorganize — SellerSheet always adapts.
Recovery & Starting Fresh
My Resources doubles as a self-repair tool. Click any item's link or use Re-Initiate Resources at the bottom — SellerSheet checks every folder, spreadsheet, and sheet tab by name. If the exact name is missing, it creates a fresh template. Resources that already exist are left untouched.
Deleted something by accident?
Click the missing item's name in My Resources, or click Re-Initiate Resources. SellerSheet creates a new resource and remembers it automatically.
Want a clean sheet template?
Rename the existing sheet tab (e.g.,
Invoices→Invoices - Backup), then click Re-Initiate Resources. SellerSheet sees the original name as missing and creates a fresh template alongside your renamed copy.Want to keep a full backup?
Use File → Make a copy to duplicate the entire spreadsheet or folder first. Then clear the data in the original. SellerSheet continues using the original because the ID hasn't changed — your backup is safely separate.
Important
Recreated sheets are empty templates — your previous data is not restored. Always make a copy first if you need to preserve existing data.
Important Rule
You can only run actions for stores that appear in your "Store" column. Always ensure the sheet tab you are on matches the dropdown menu you use in the sidebar.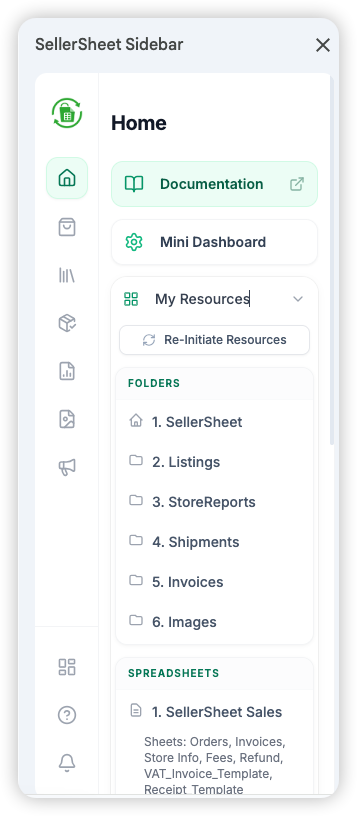
Folders & Spreadsheets
Store Management
Sales
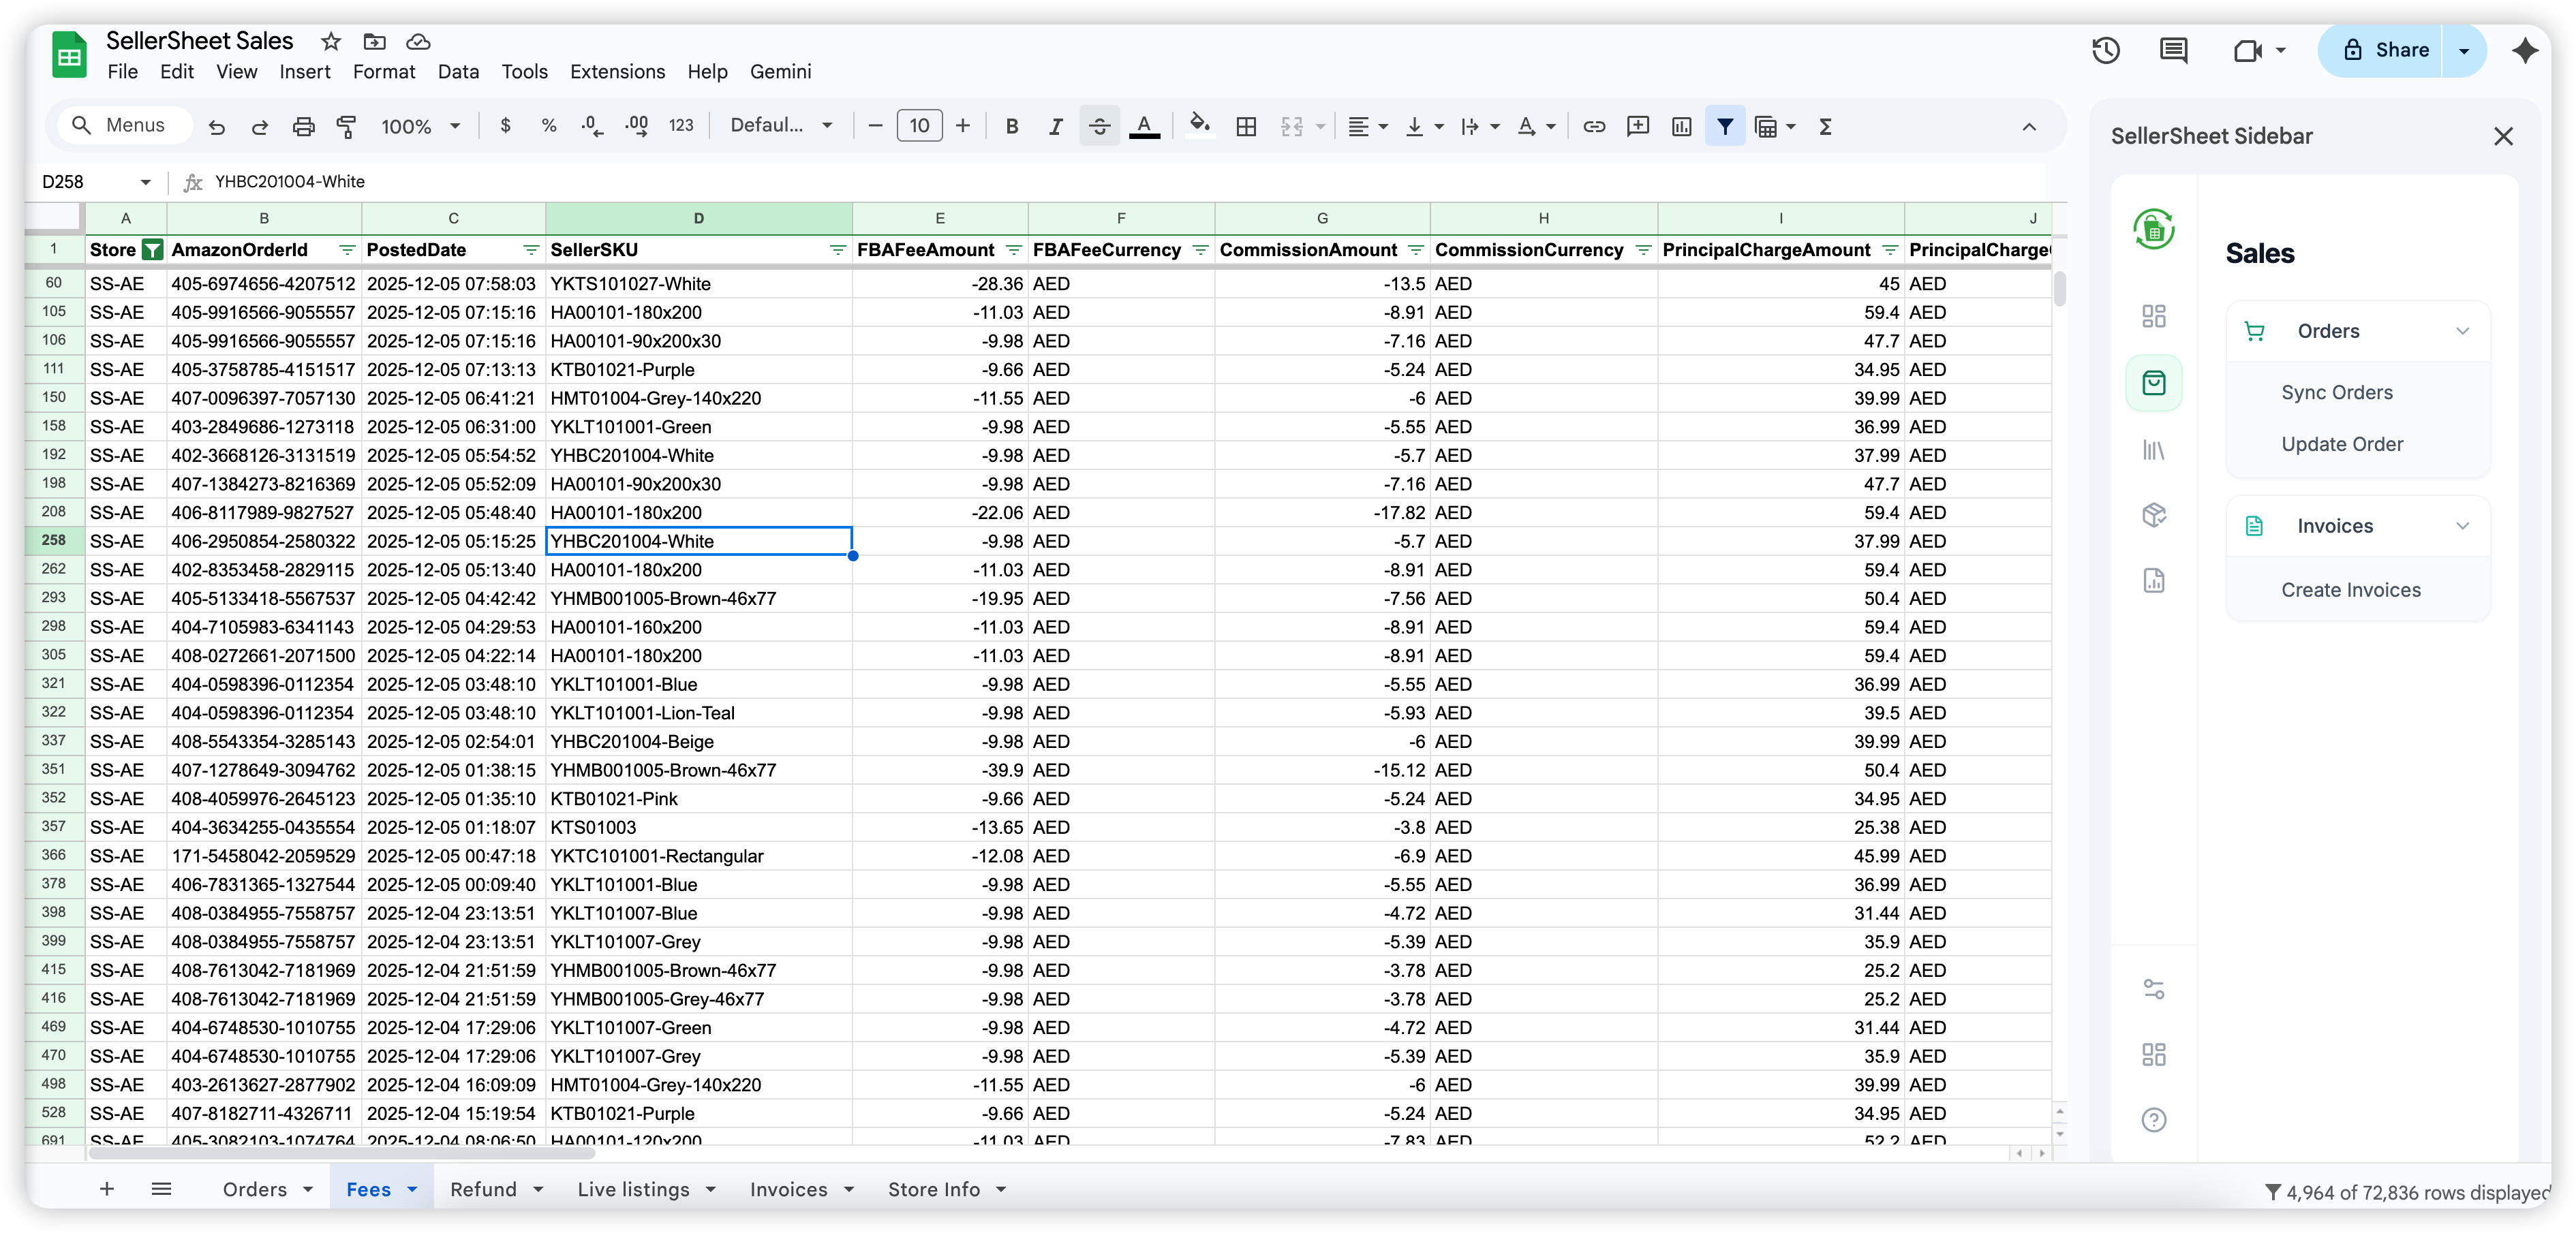
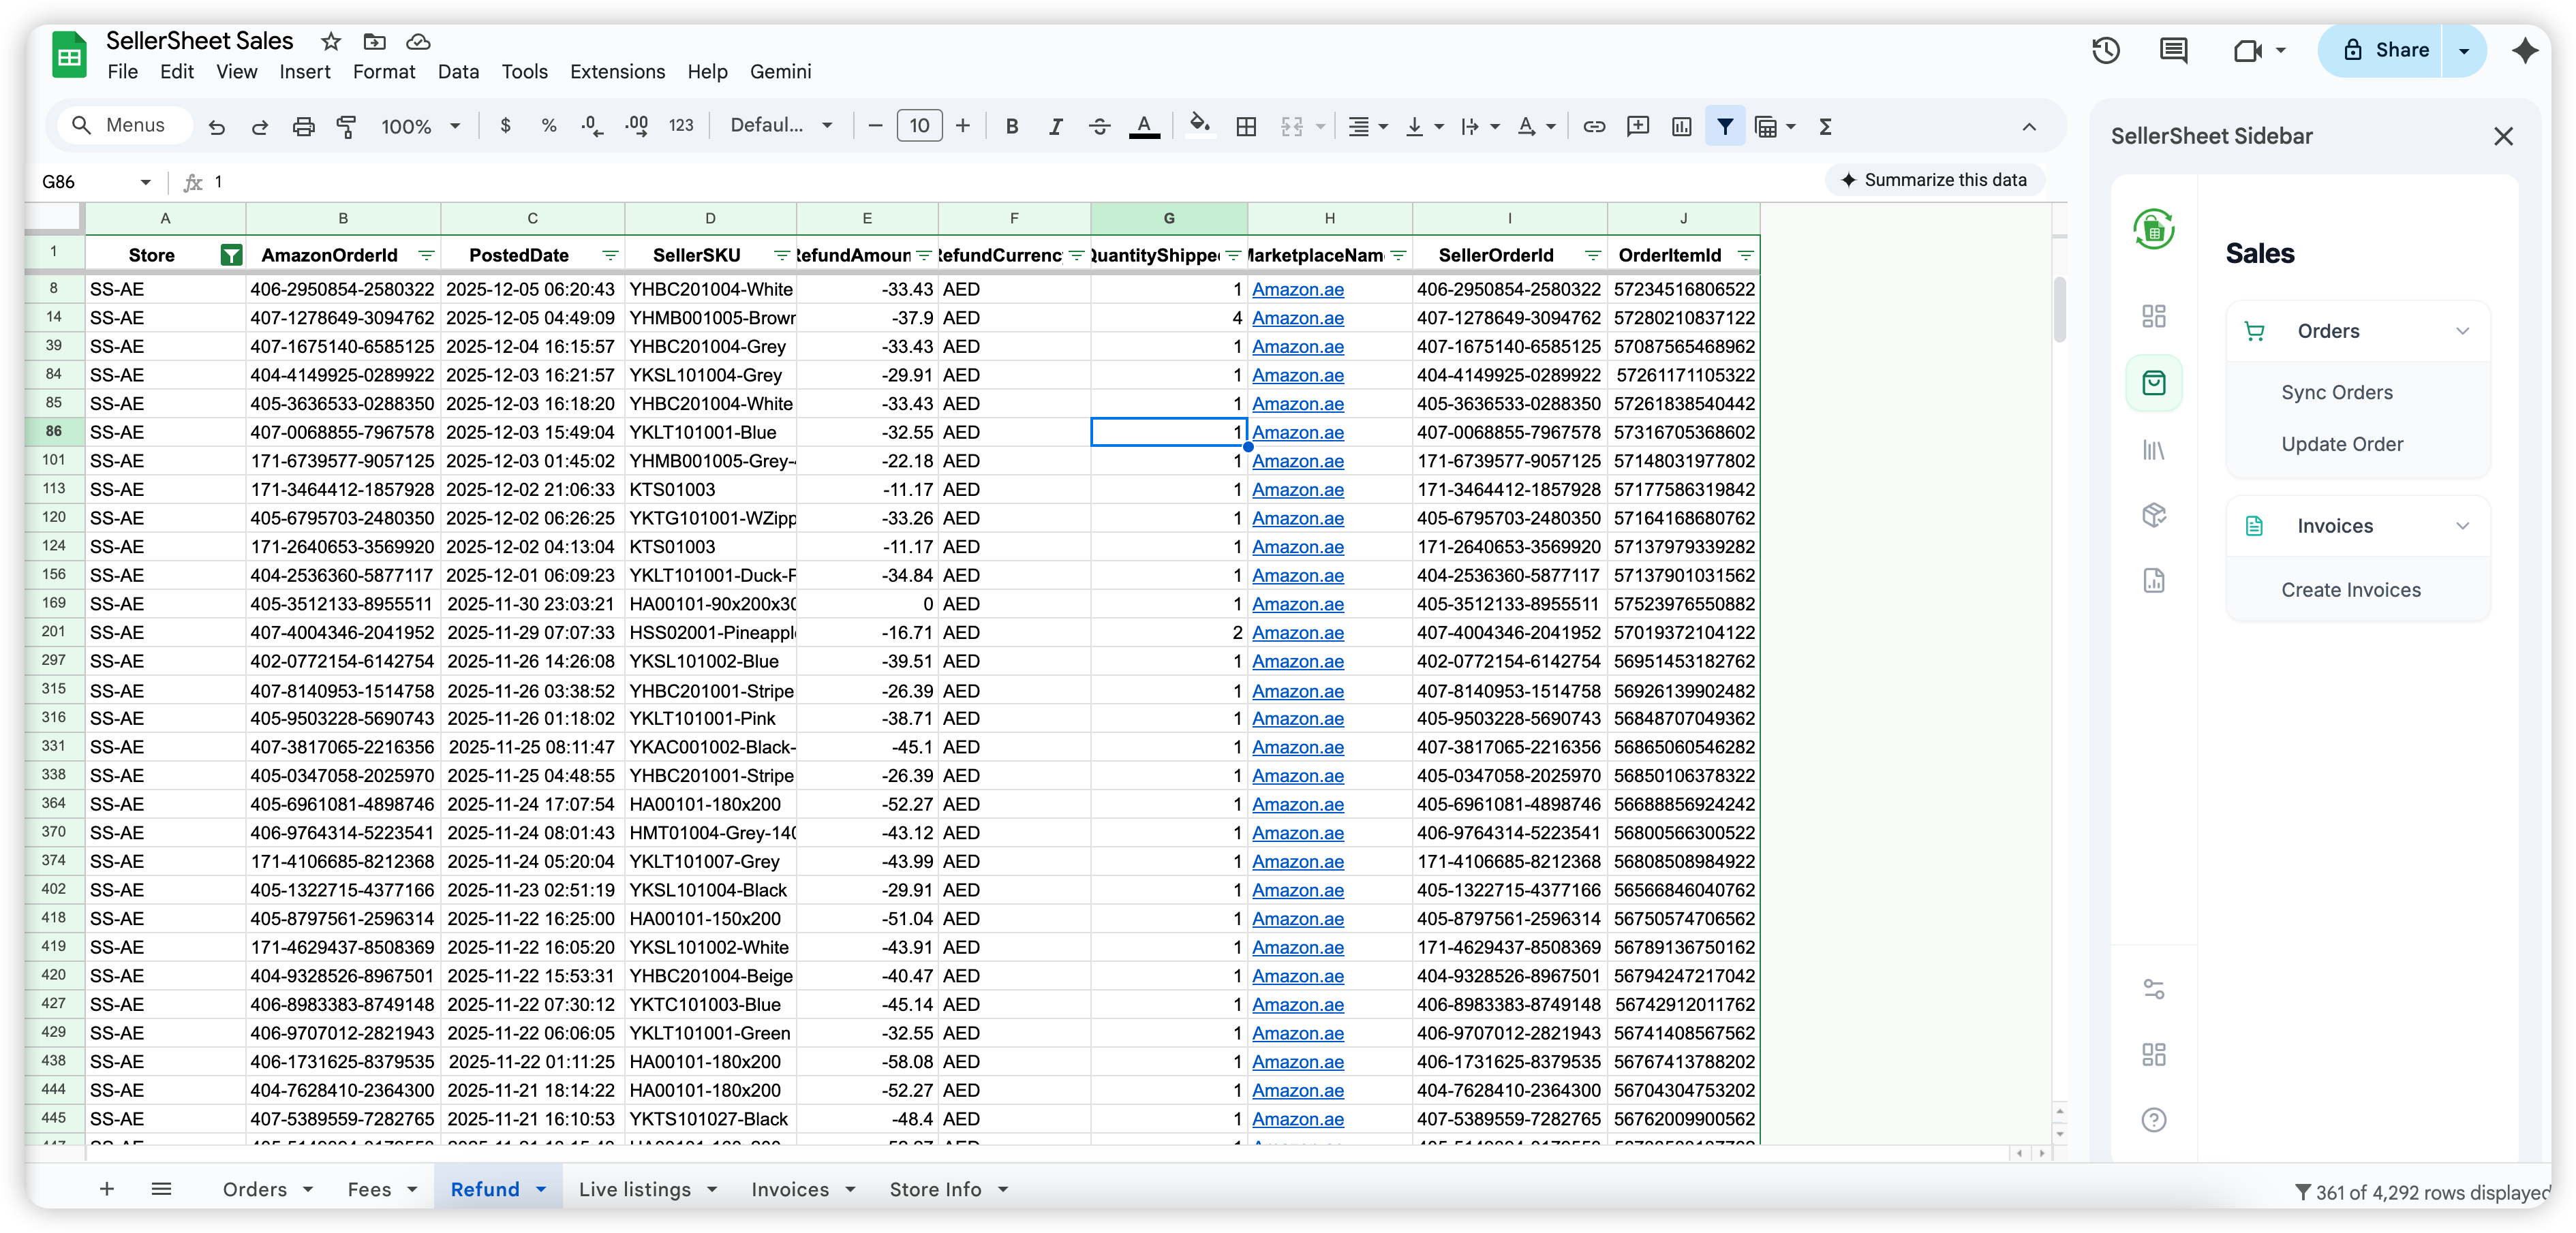
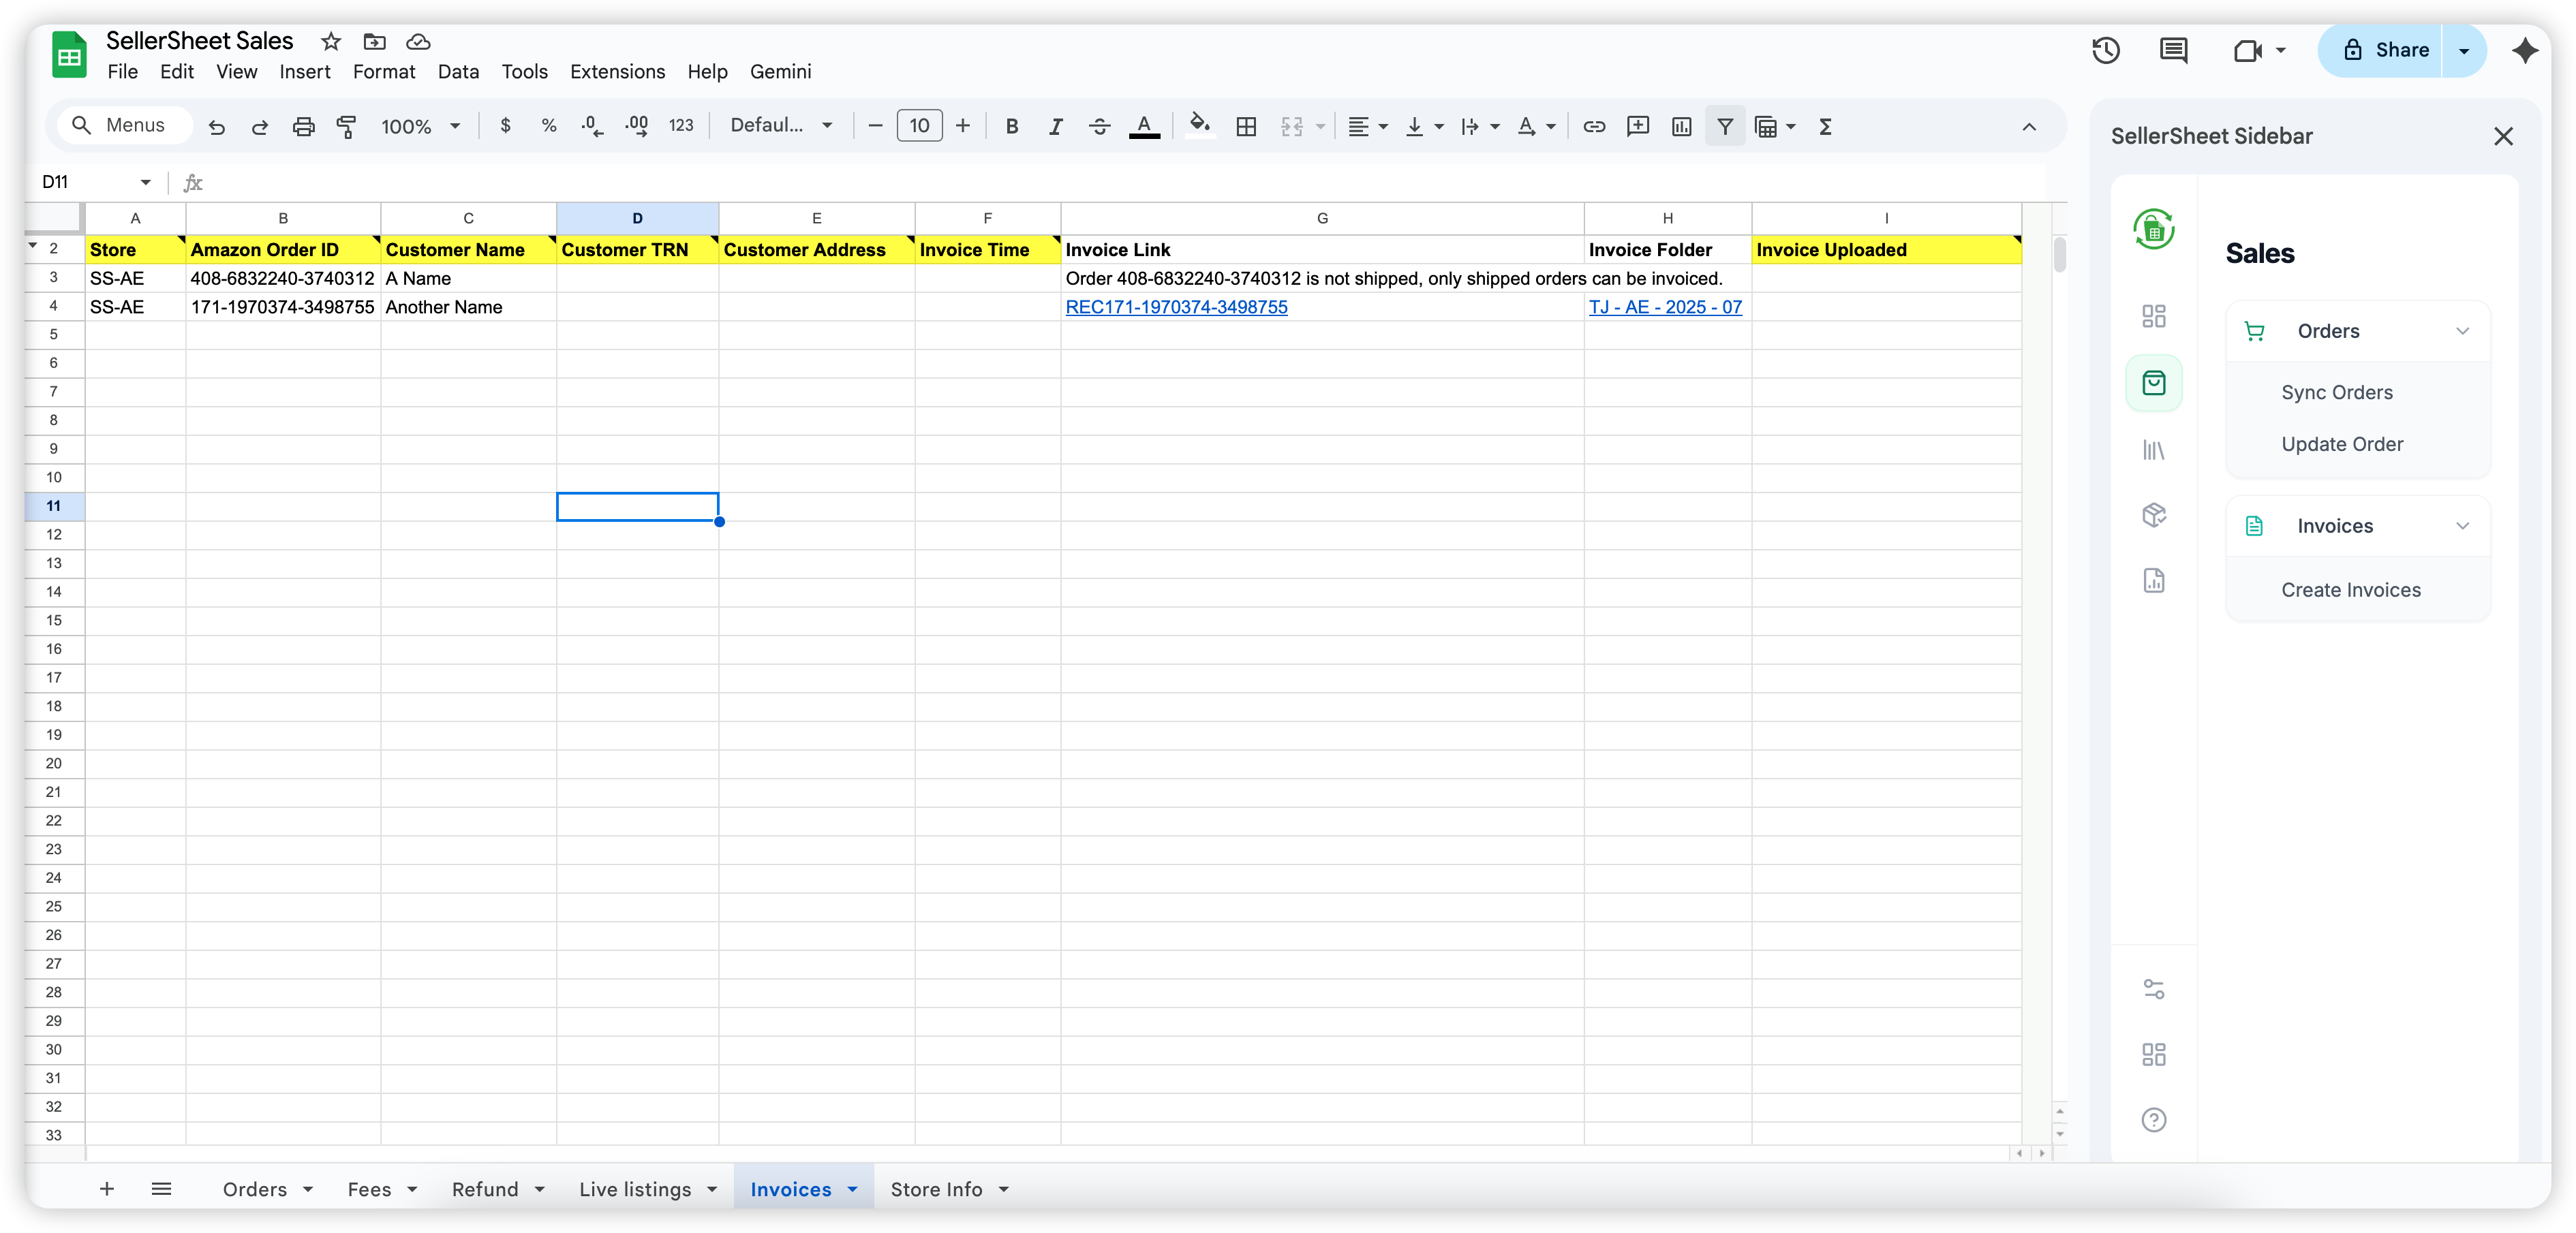
Sync orders, fees, refunds, and invoices from Amazon into your spreadsheet.
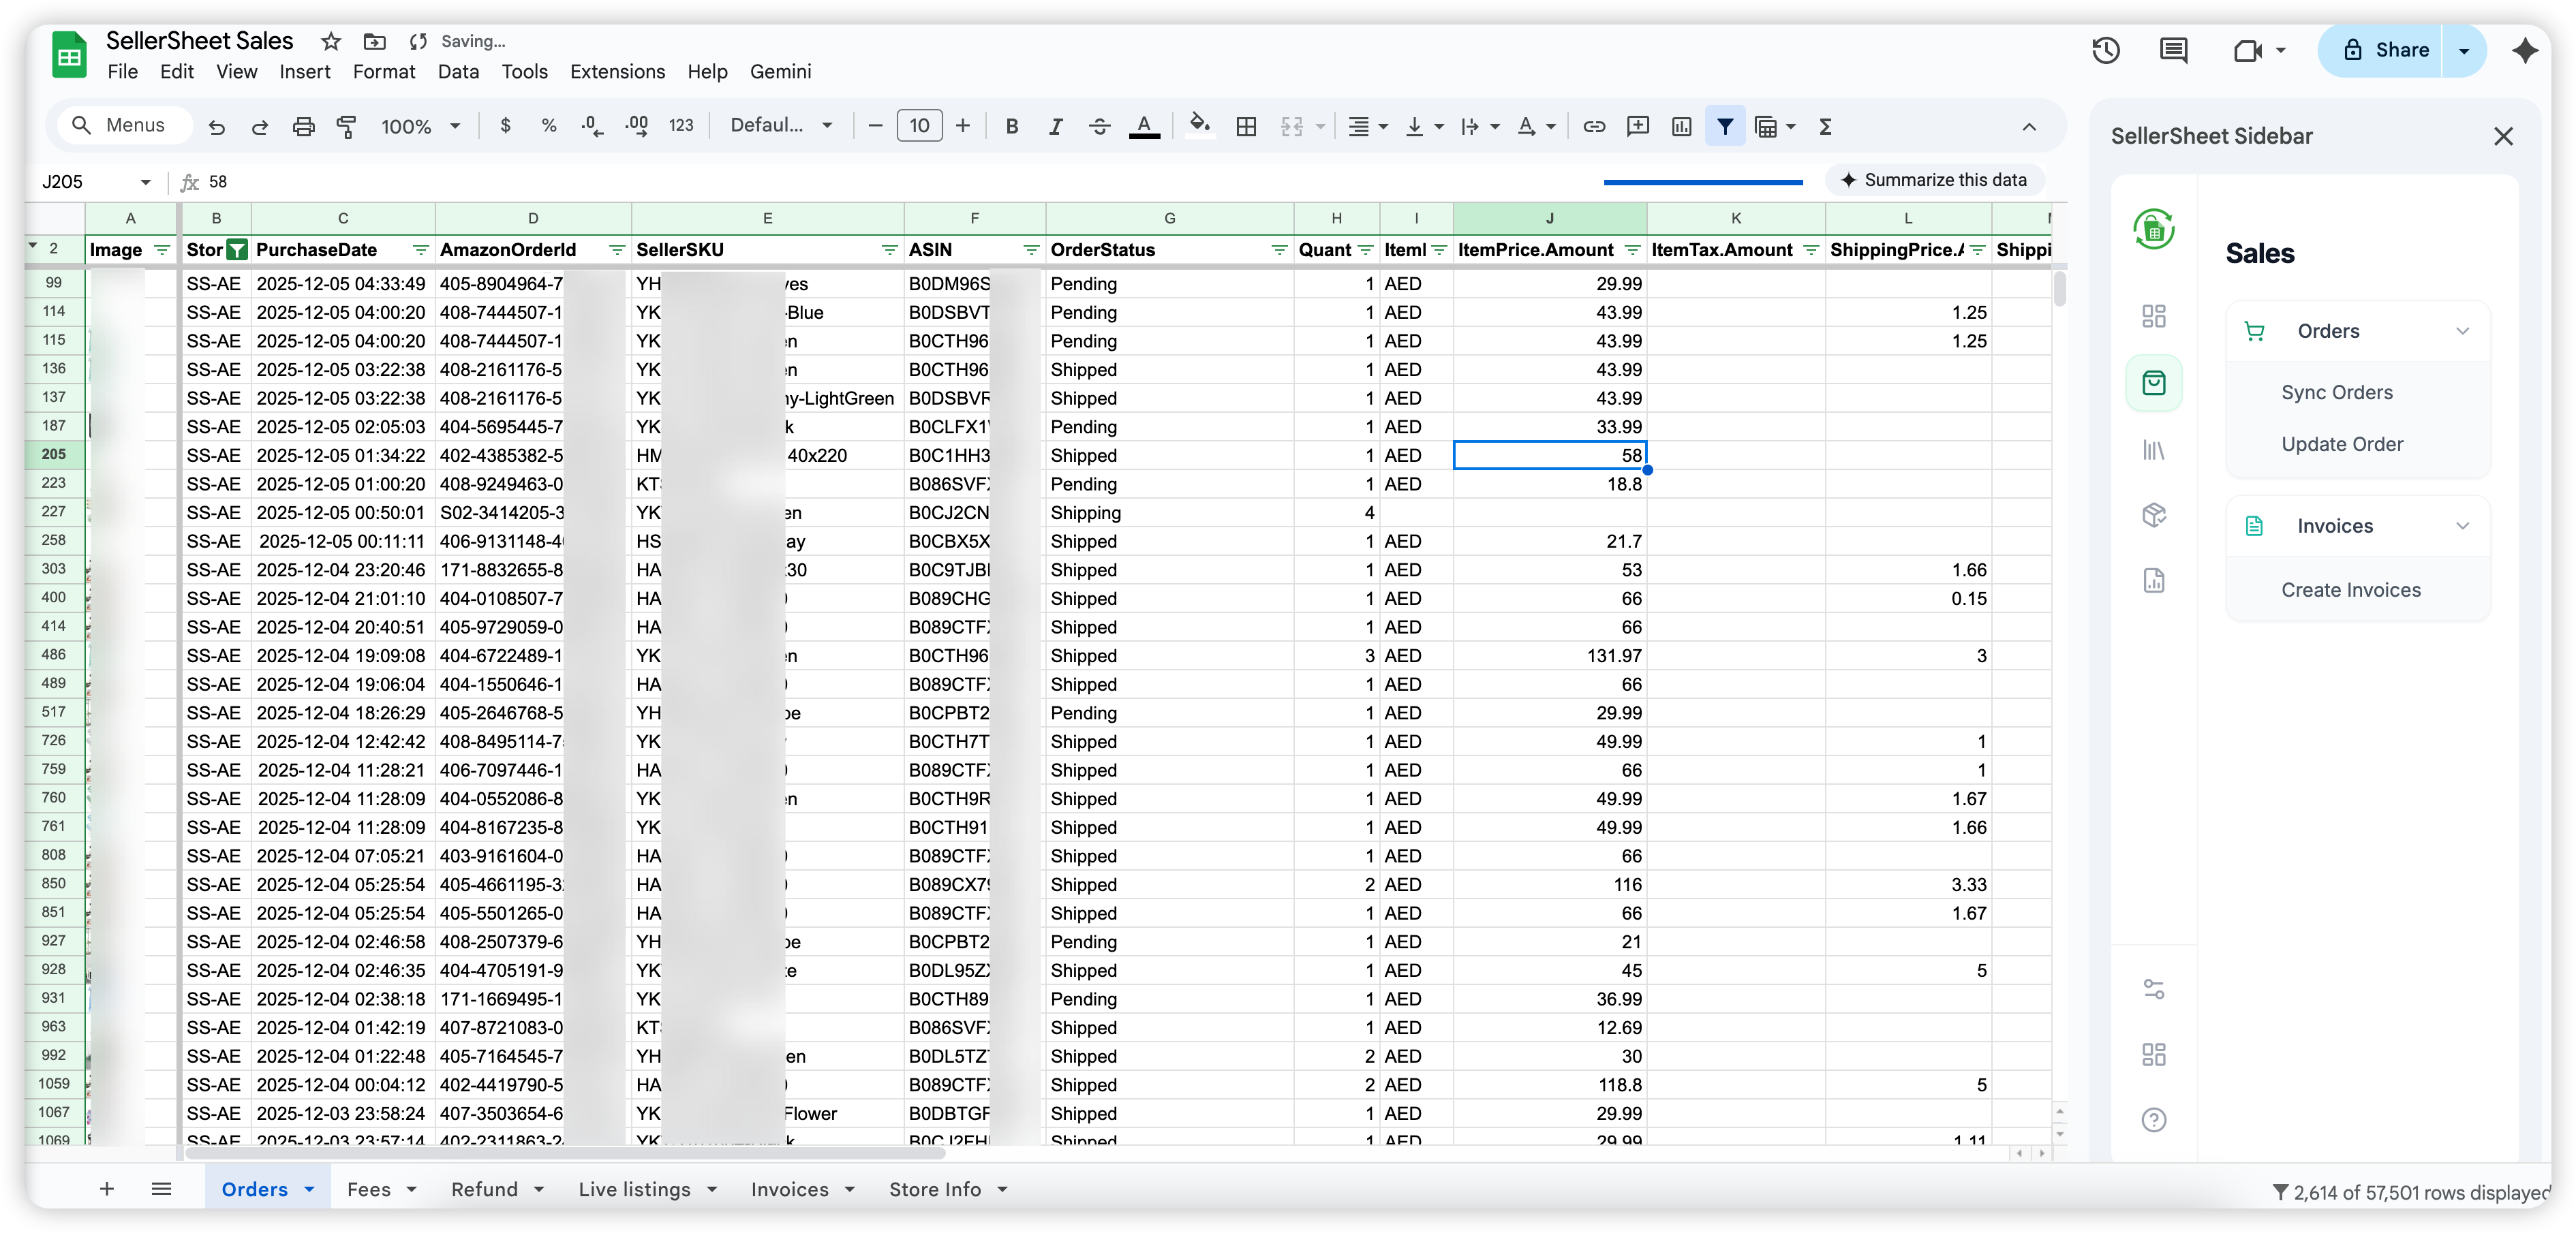
- Open the Sales spreadsheet from the sidebar Resources section.
- Navigate to the Orders sheet tab.
- In the sidebar, click Sync Orders — fetches all recent orders from Amazon and distributes them across Orders, Fees, and Refund sheets.
- For invoices, go to the Invoices sheet, fill in your store identifier, and click Get Invoices.
Store identifier: Each sheet that pulls Amazon data requires your store identifier in a designated cell (e.g. A2). Use the exact name shown in the sidebar — e.g. MyStore-AE.
Advertising (PPC)
Manage Sponsored Products, Brands, and Display from dedicated sheets: SP Campaigns, SP Ad Groups, SP Keywords, SP Targets, SP Product Ads, SP Negatives, SP Camp Negatives, Portfolios, SB Campaigns, SD Campaigns. Every sheet follows the same pattern.
How every ads sheet works
- Setup Sheet creates or resets the header block — filters in row 4, results from row 6. Hover any header for bilingual guidance.
- List fetches entities using the row-4 filters. By default only active (enabled + paused) entities load — set State to ALL or ARCHIVED to see archived ones. Old rows are cleared on every refresh.
- Create sends rows that have the required fields and an empty ID column; new Amazon IDs are written back into the row automatically.
- Edit Selected / Archive Selected act only on rows whose Select checkbox (column A) is ticked — you can never mass-edit by accident. Archiving is permanent on Amazon.
- Status column records the per-row outcome (SUCCESS / ERROR / ARCHIVED) of your last action.
Targeting expressions — bulk-sheet syntax
The SP Targets sheet reads and writes the same expression syntax as Amazon bulk files: close-match, loose-match, substitutes, complements, asin="B0XXXXXXXX", category="12345678", price<20, rating=4-5 — refinements combine on one line. No JSON required.
Inventory Management
Monitor stock levels across FBA and FBM fulfillment channels.
Catalogs
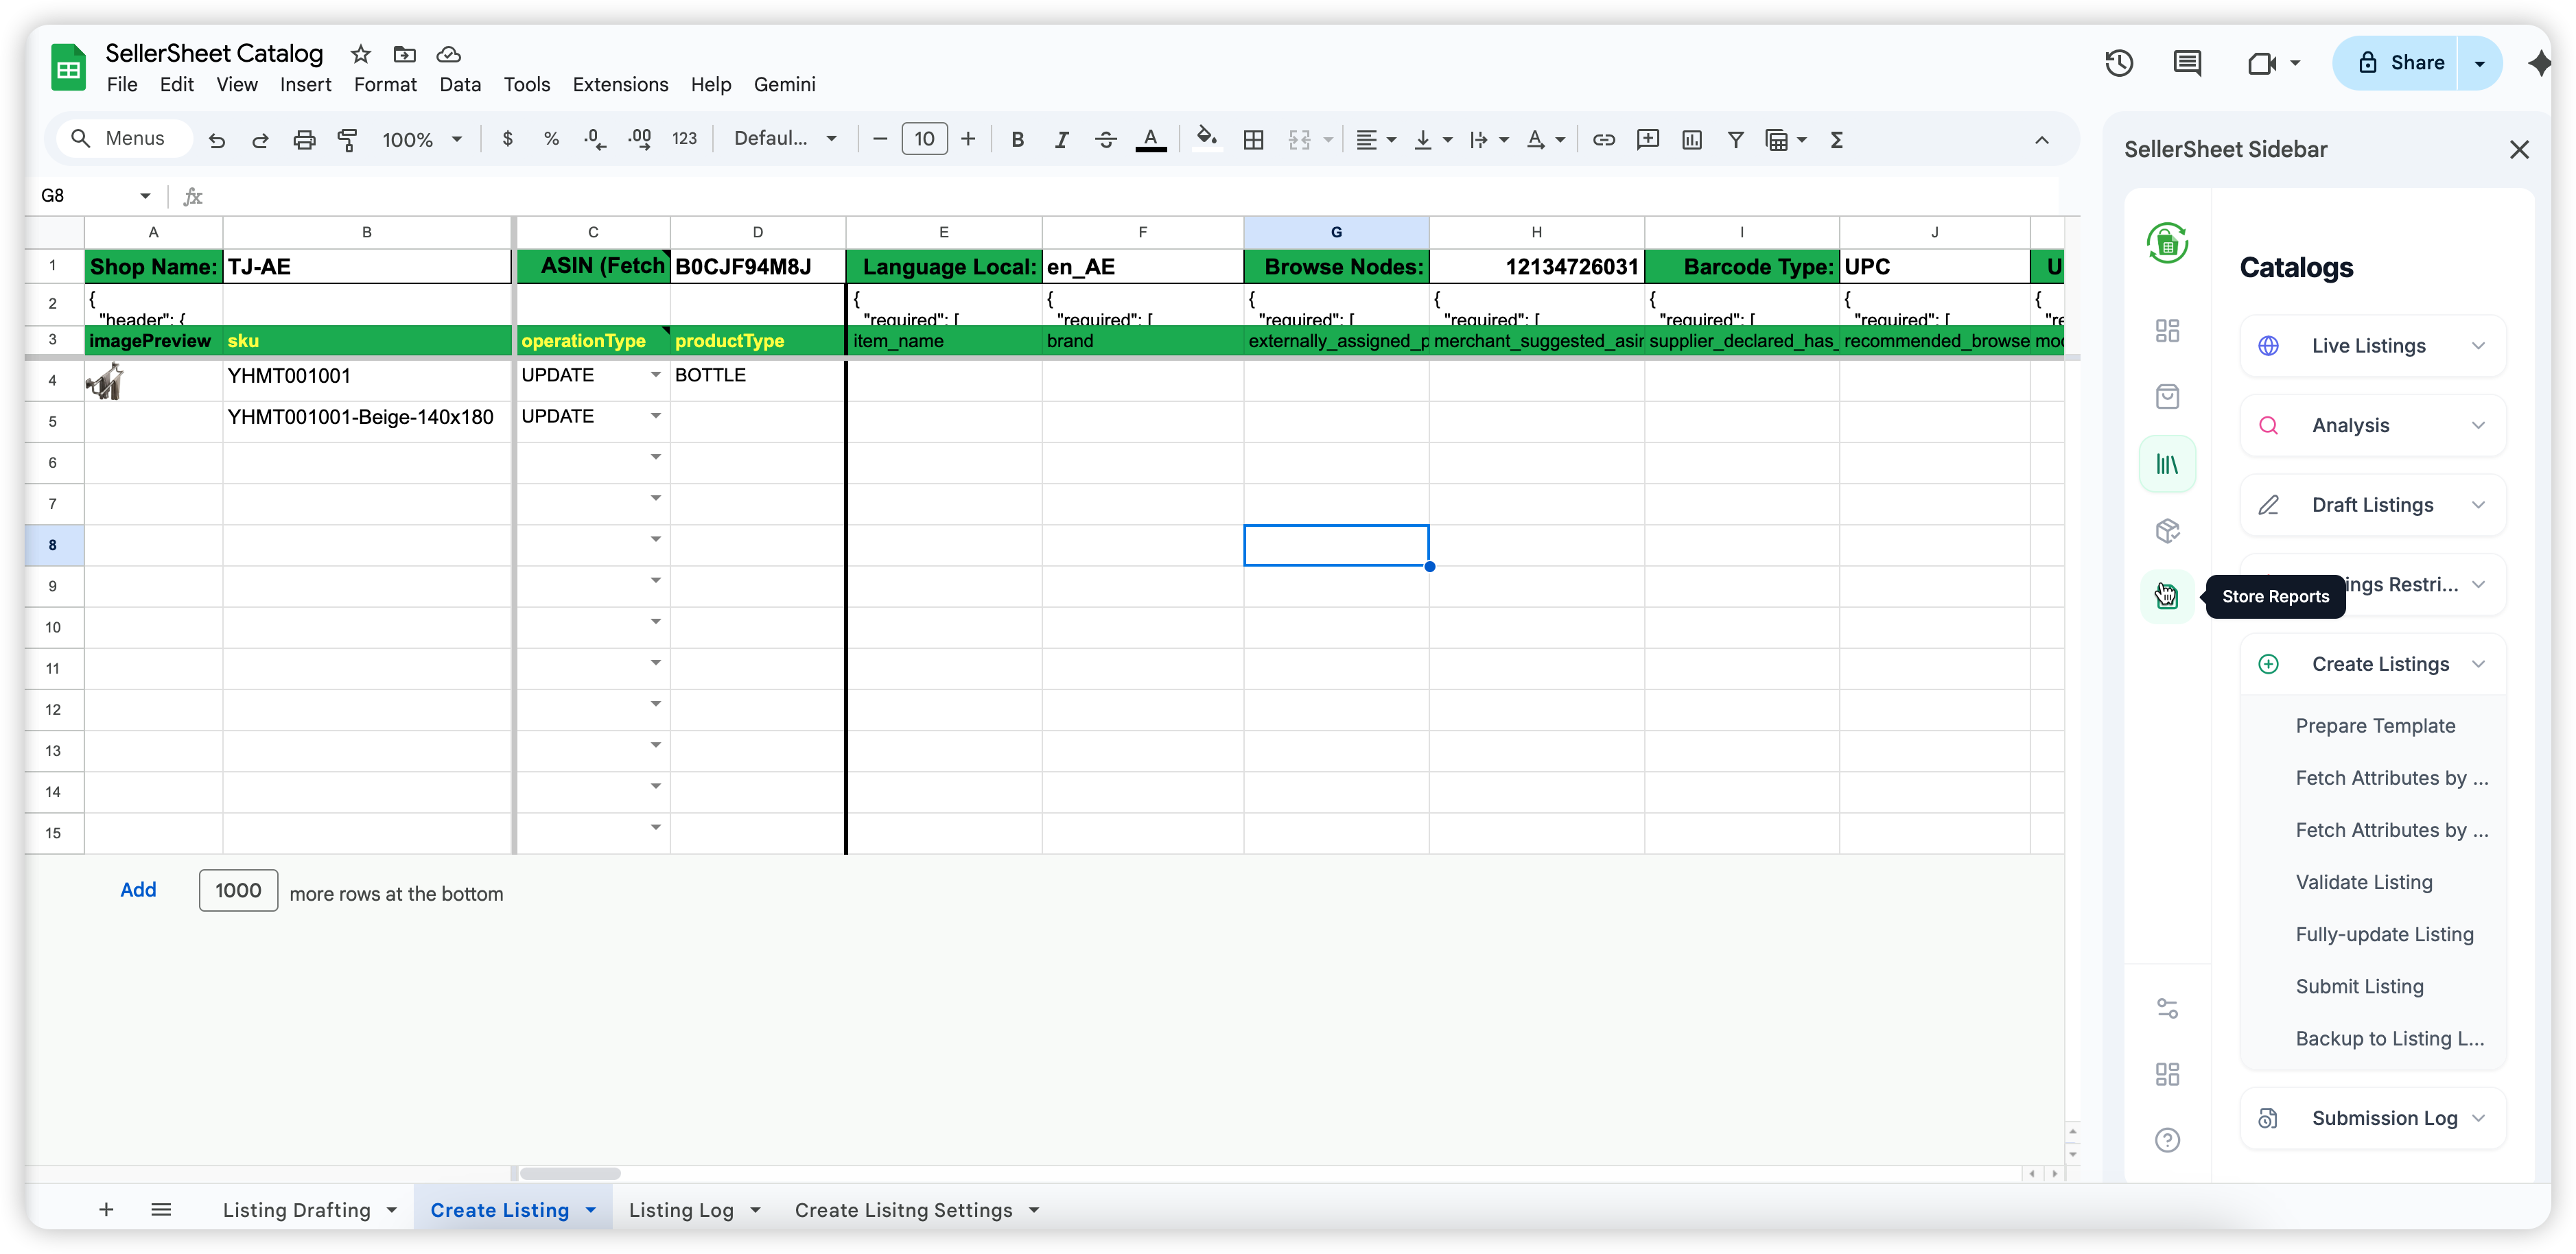
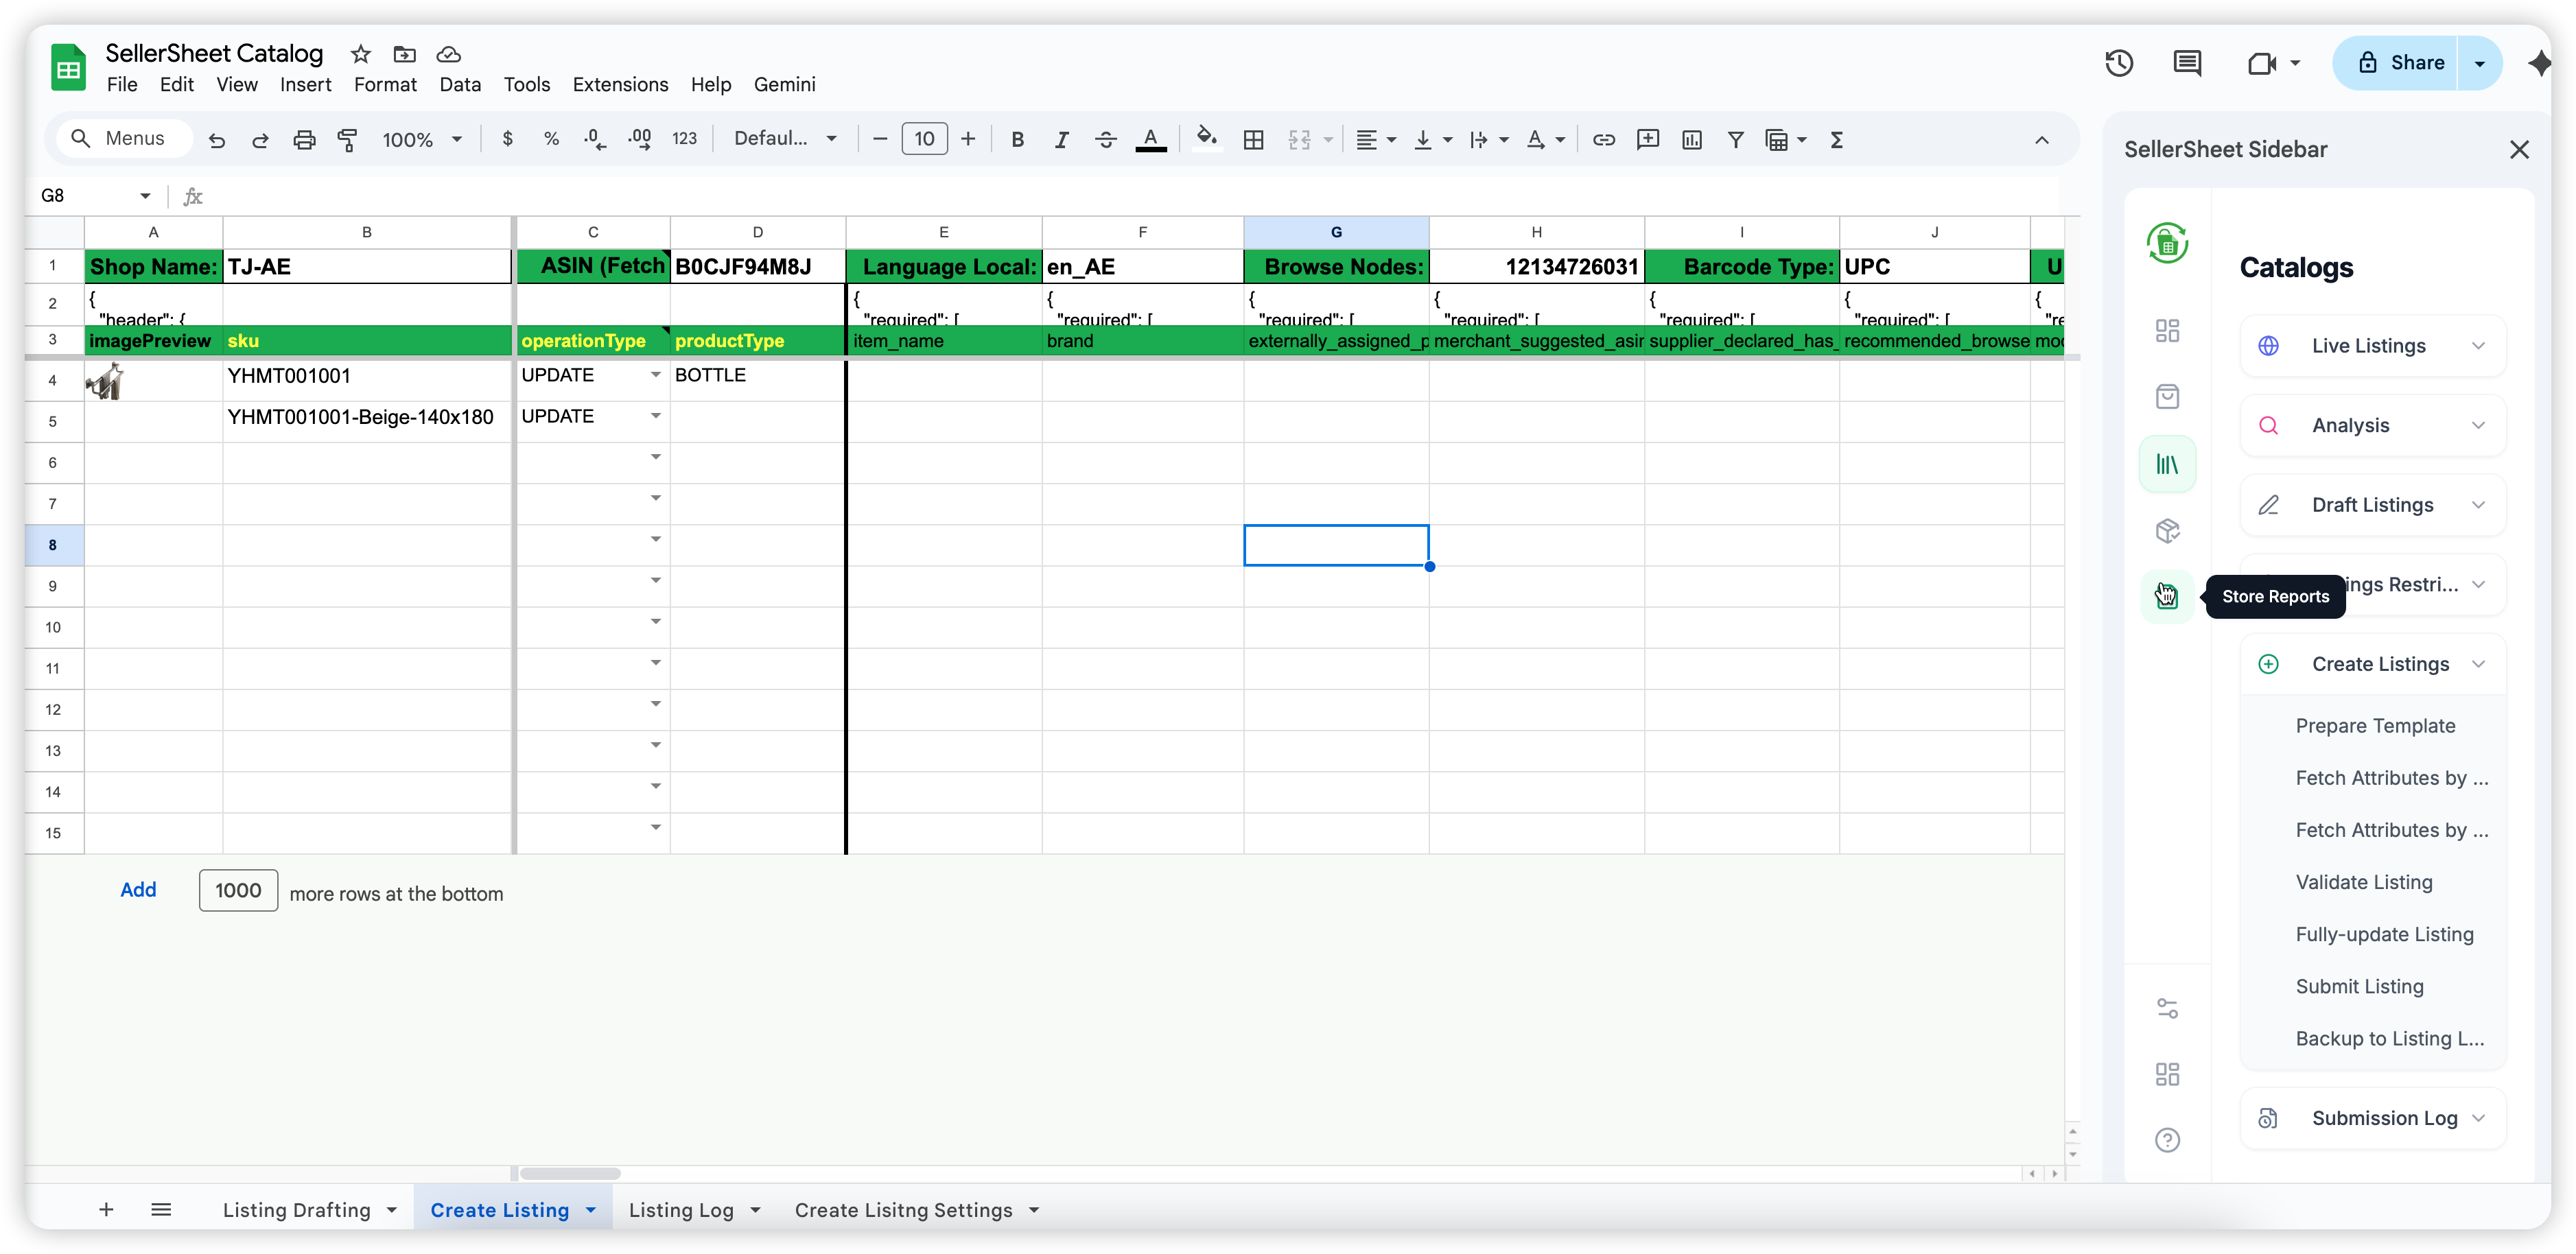
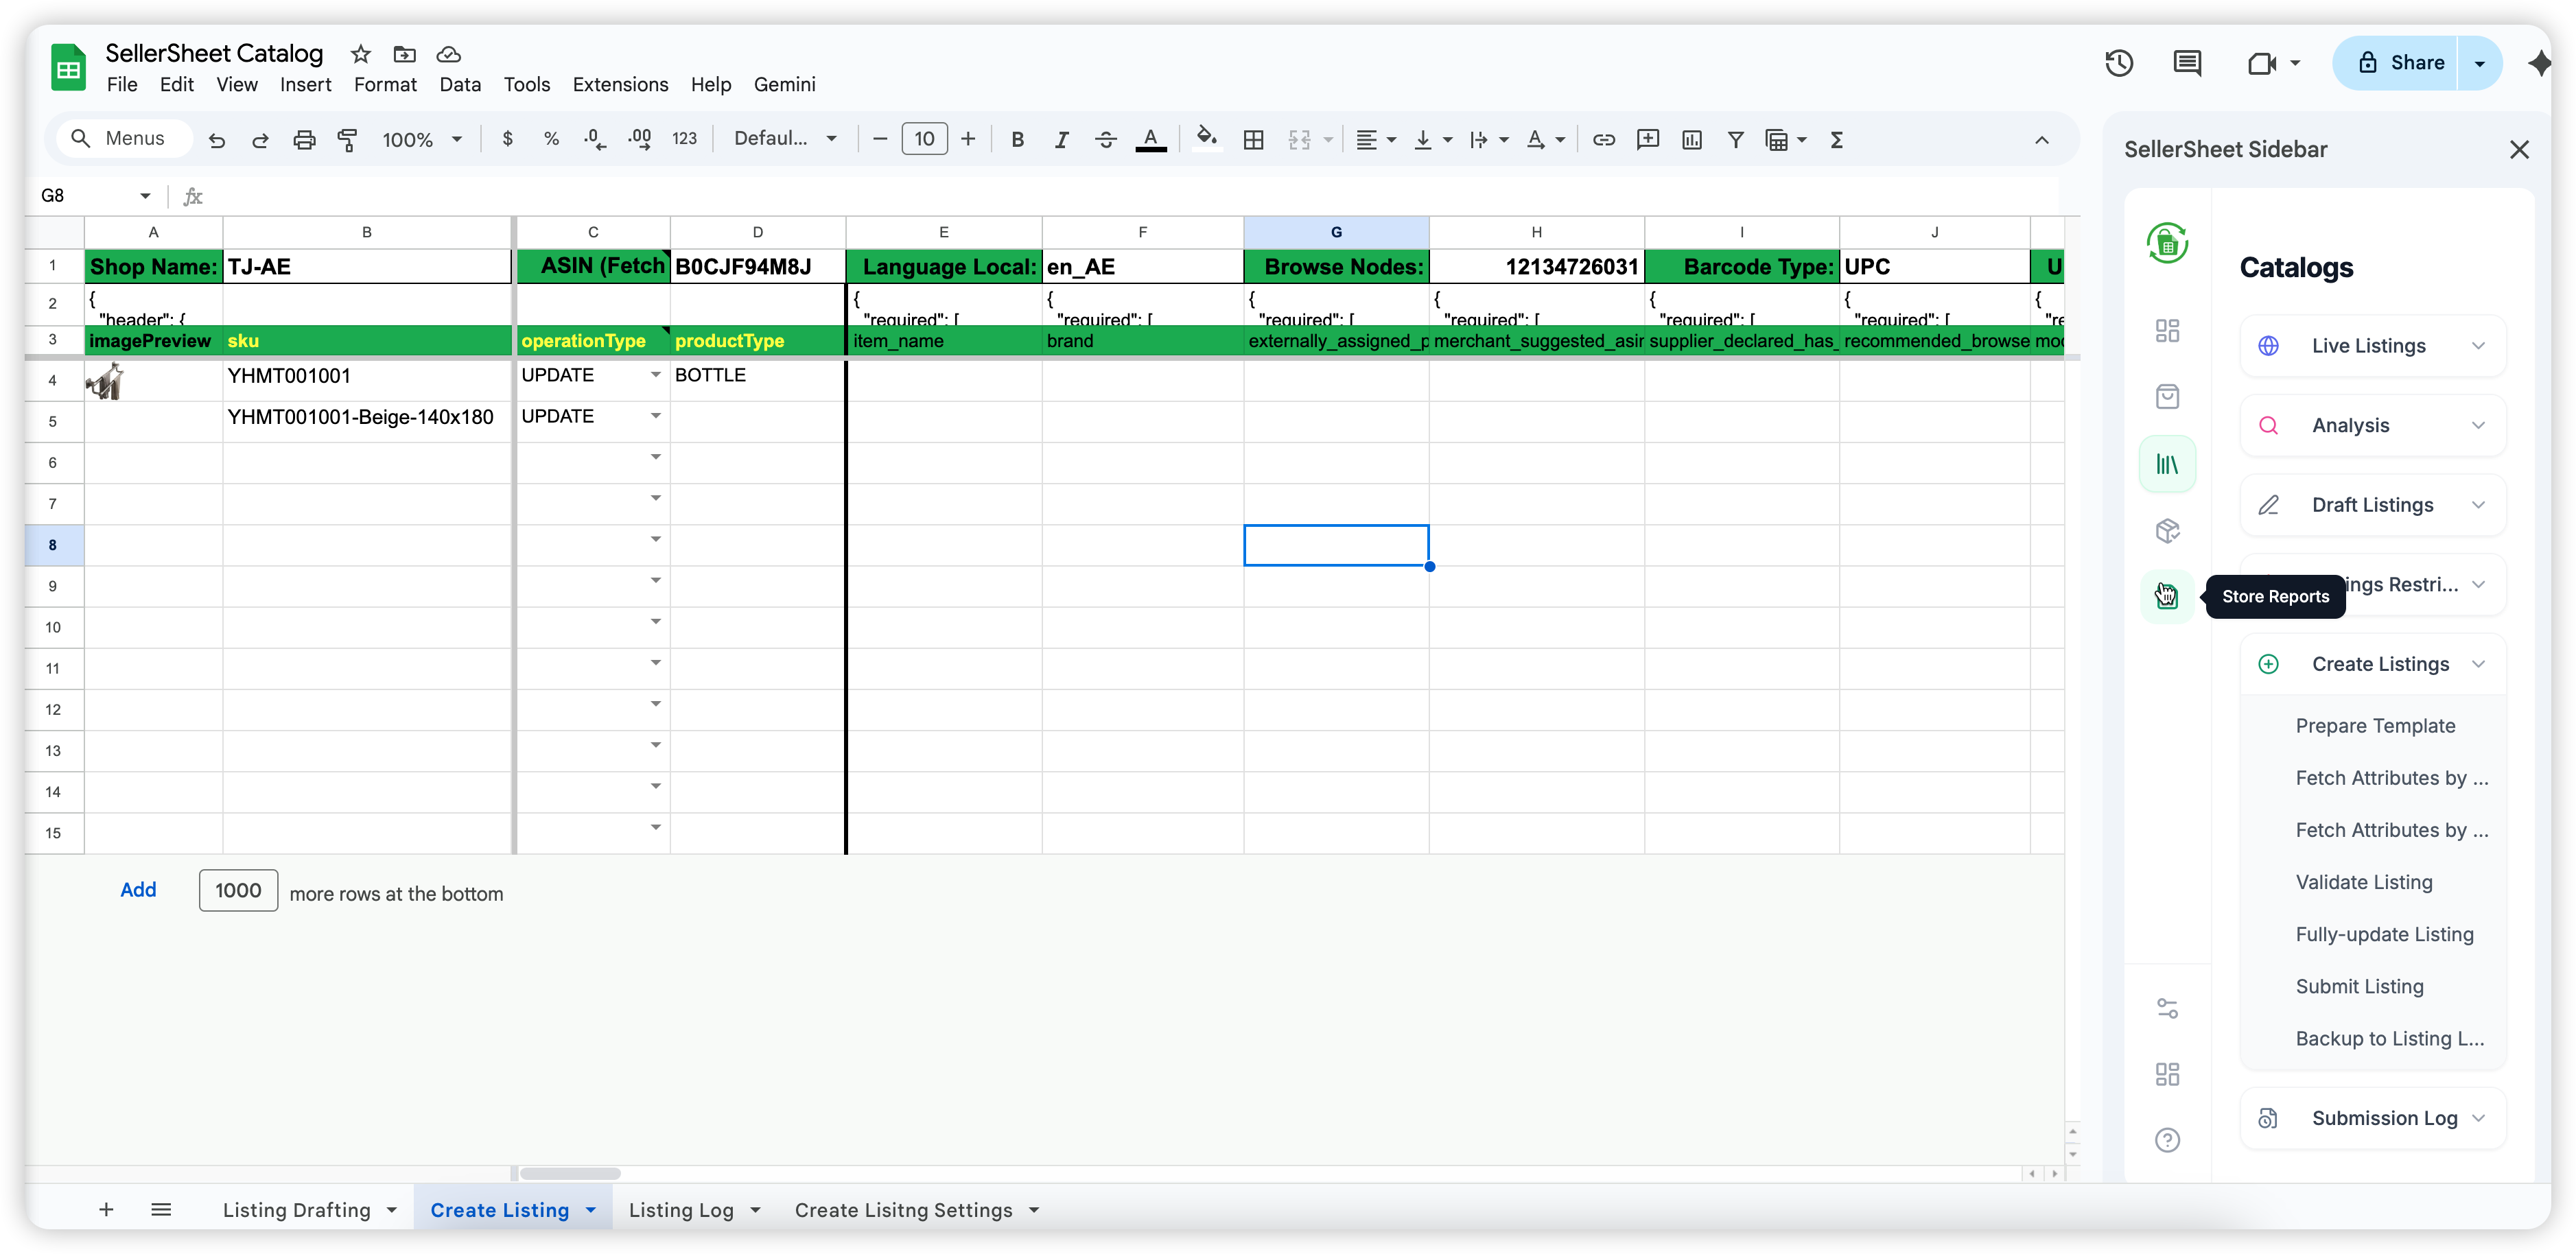
View live listings, check selling eligibility, draft new listings, and submit listing updates to Amazon.
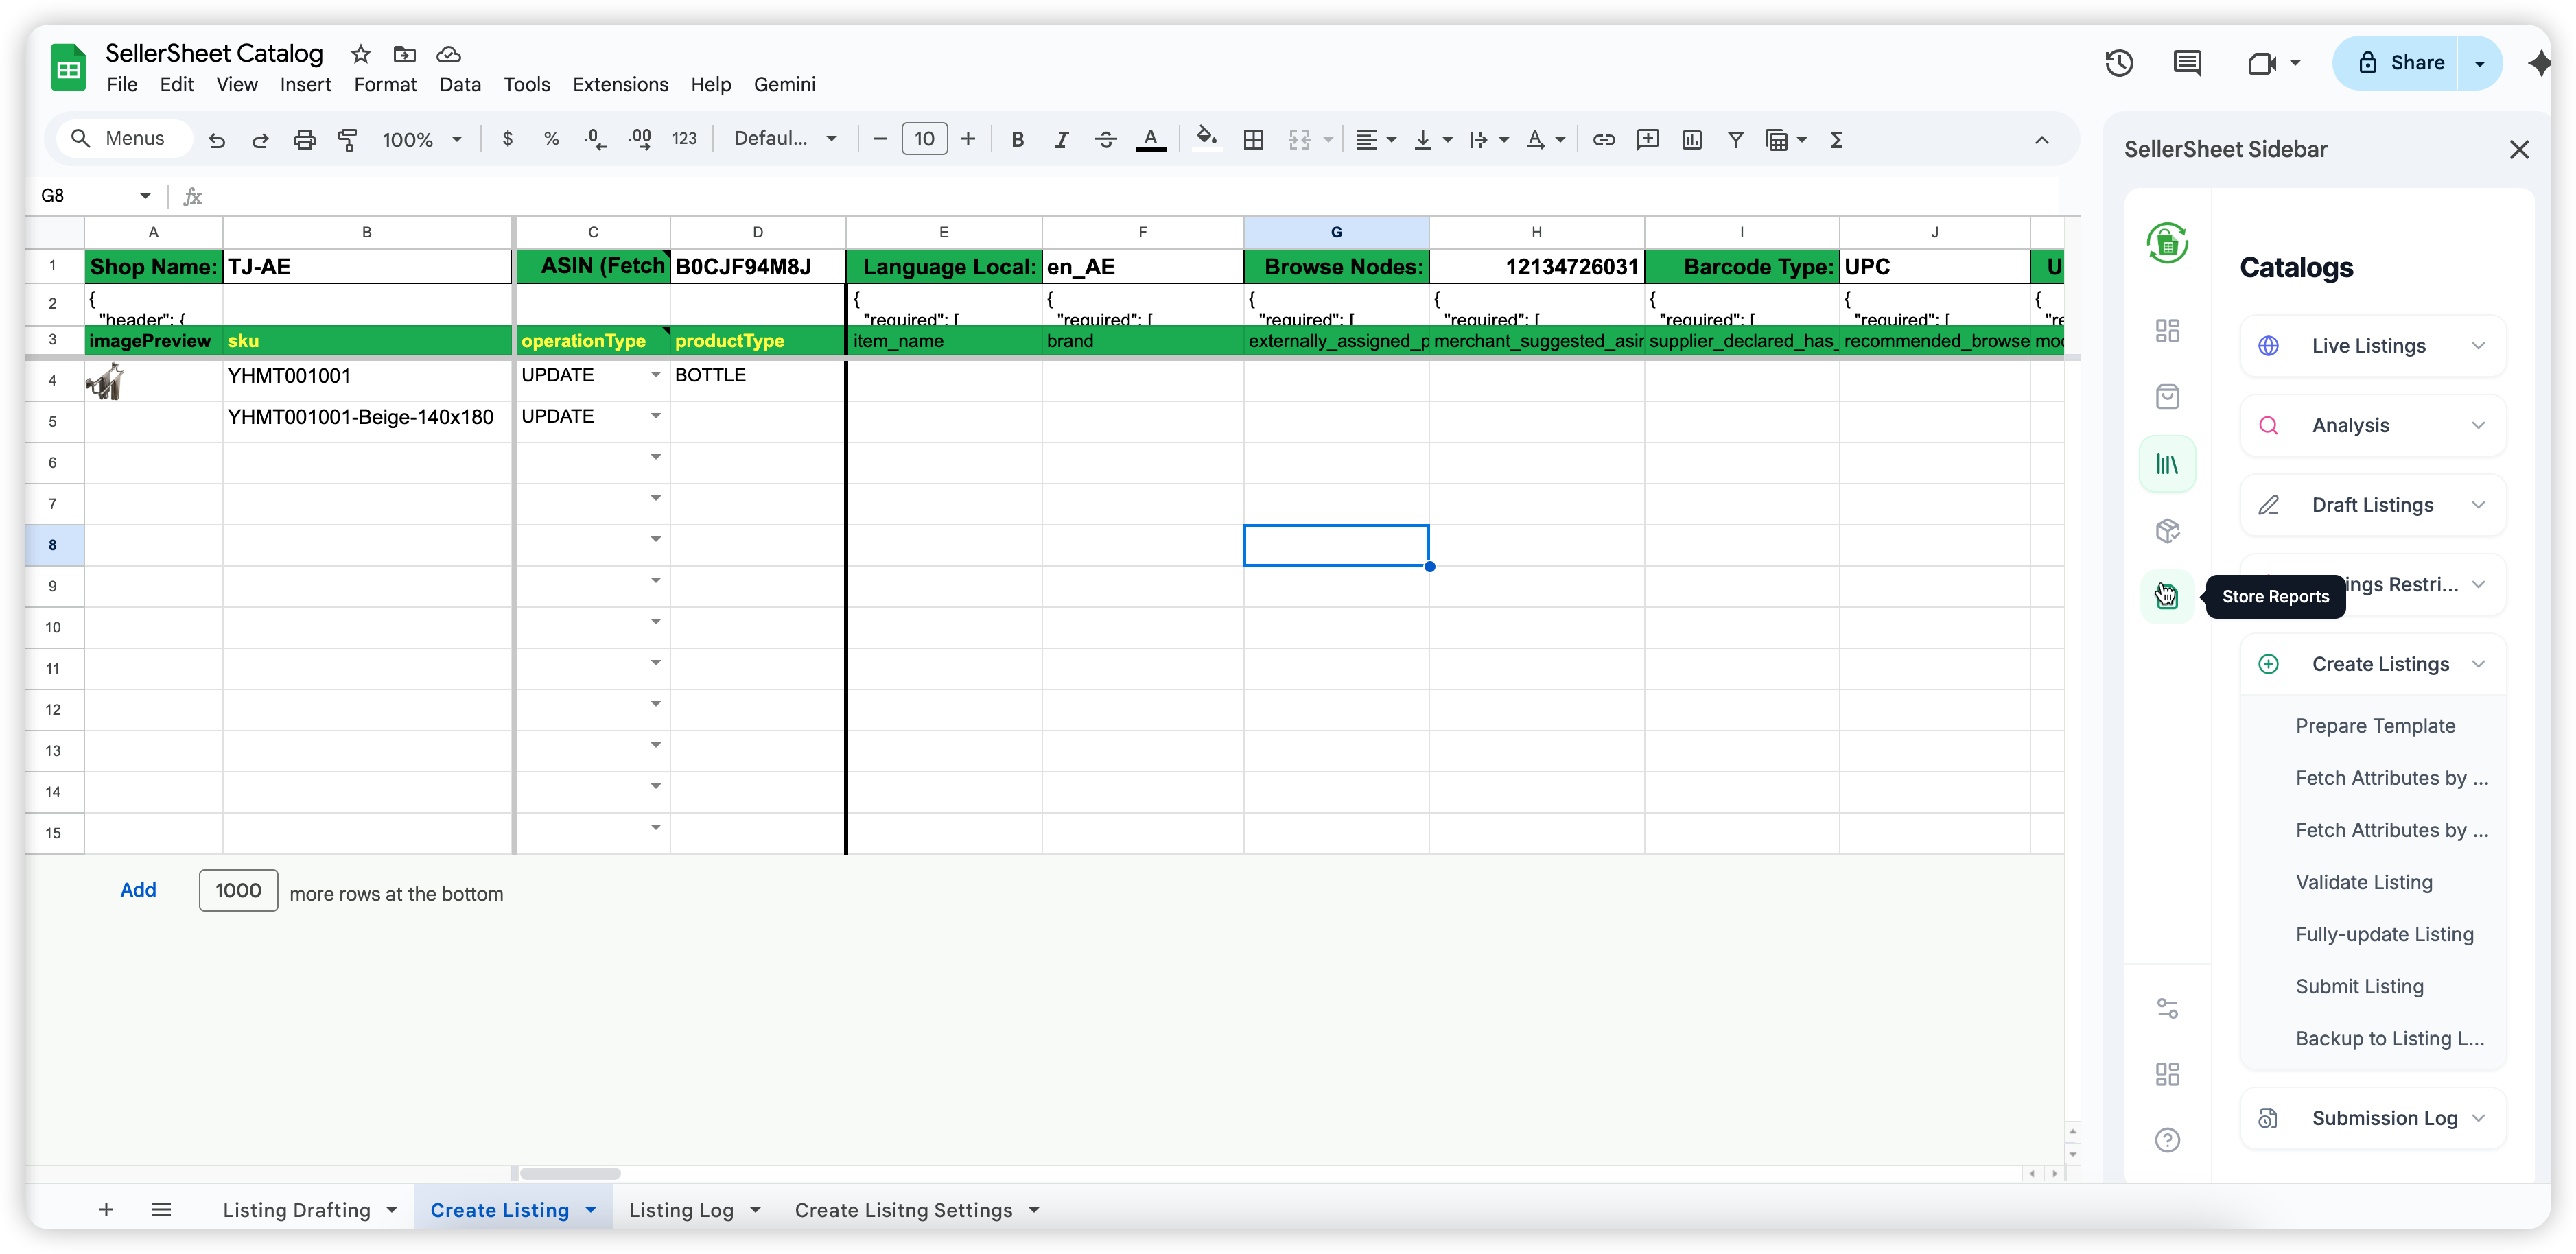
- Open the Catalogs spreadsheet from the sidebar Resources section.
- Go to the Live Listings sheet, enter your store identifier in A2, and click Sync Listings to pull your current catalog.
- To check selling eligibility for an ASIN, go to the Listing Restrictions sheet, enter the ASIN, and click Check Restrictions.
- To create or update listings in bulk, fill in the Draft Listings sheet and click Submit Listings. Monitor results in the Submission Log sheet.
FBA Fulfillment
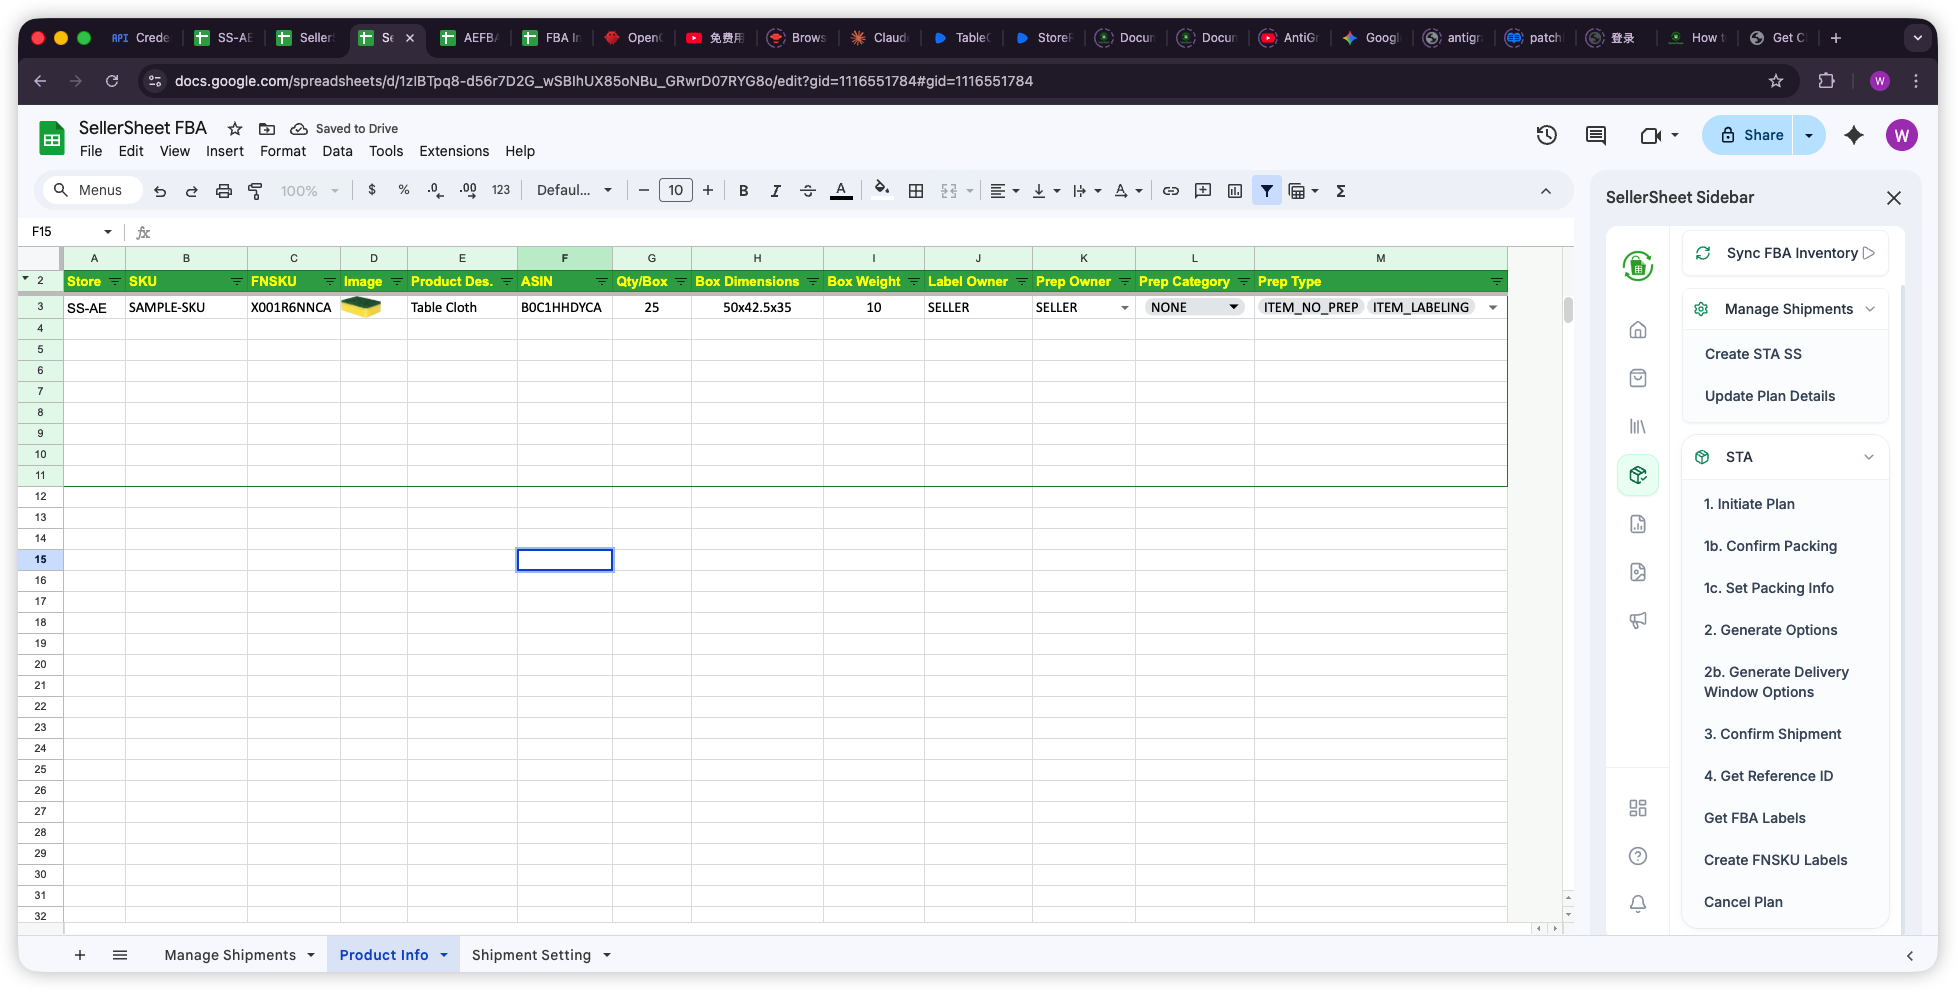
Create FBA shipments, generate box labels, and track shipment status — all from Google Sheets.
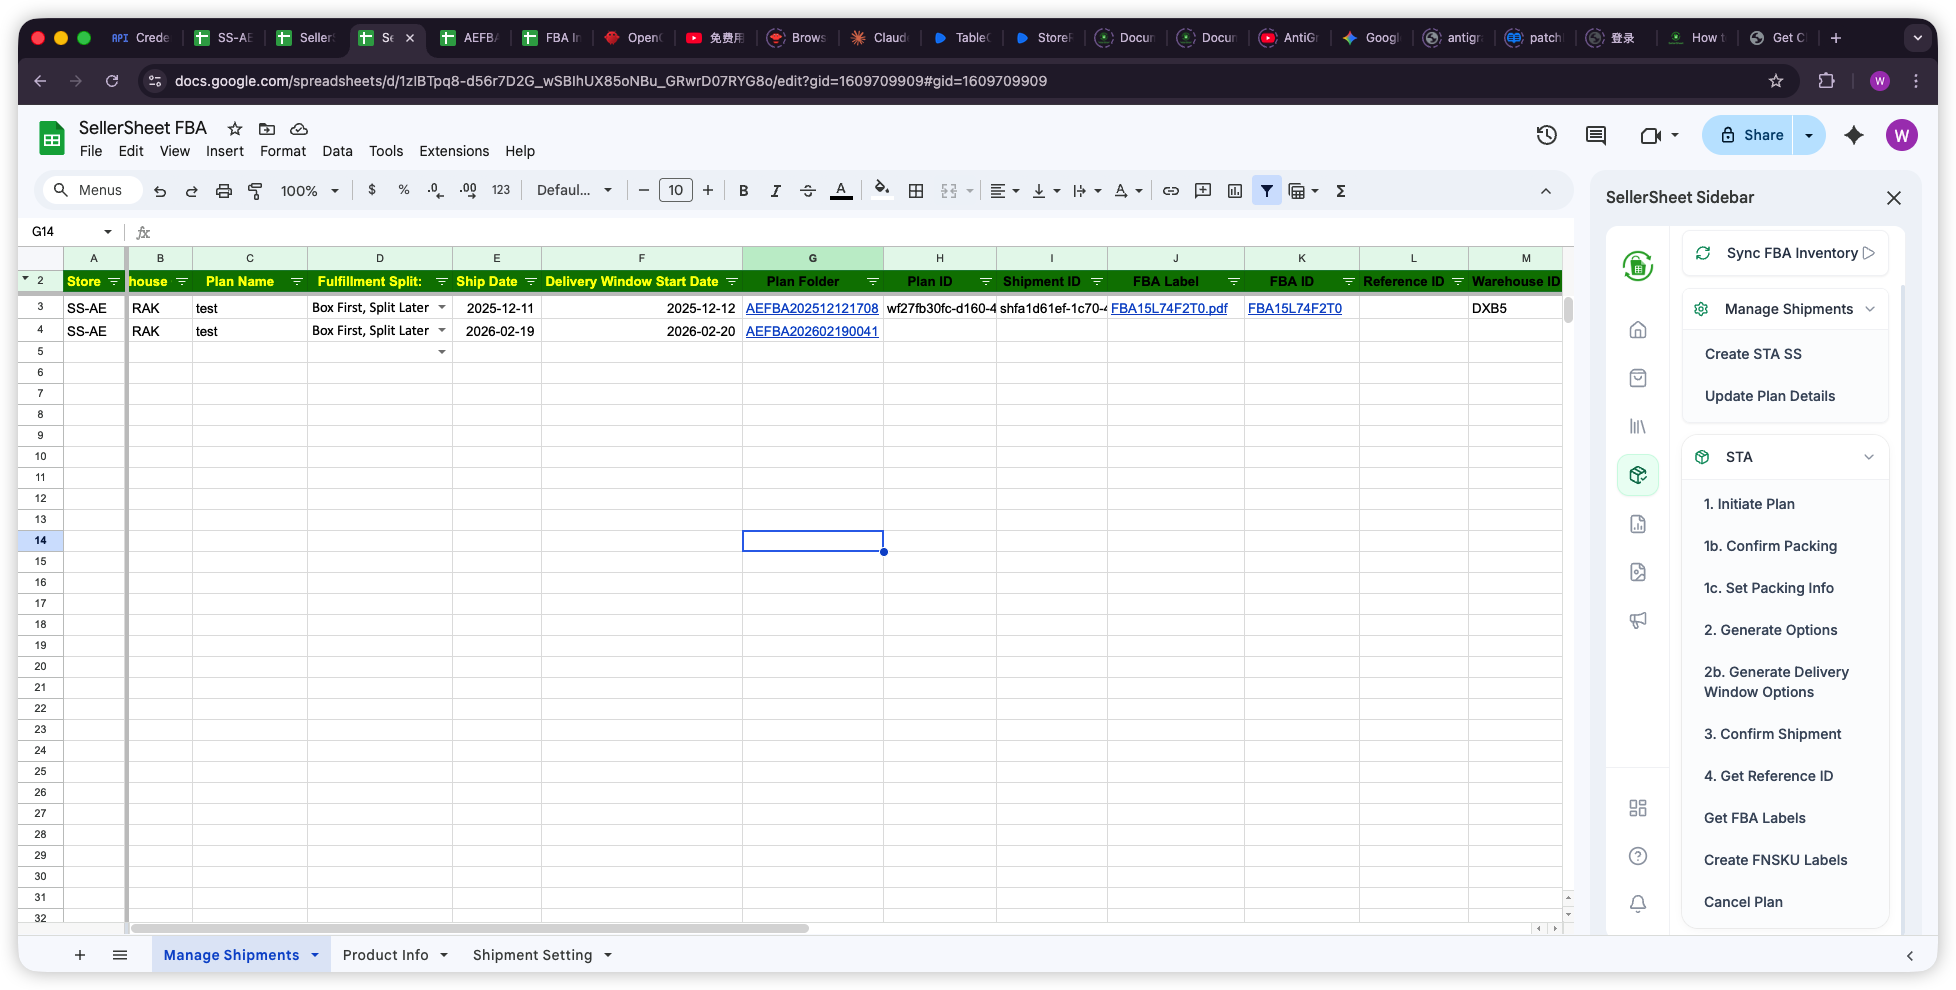
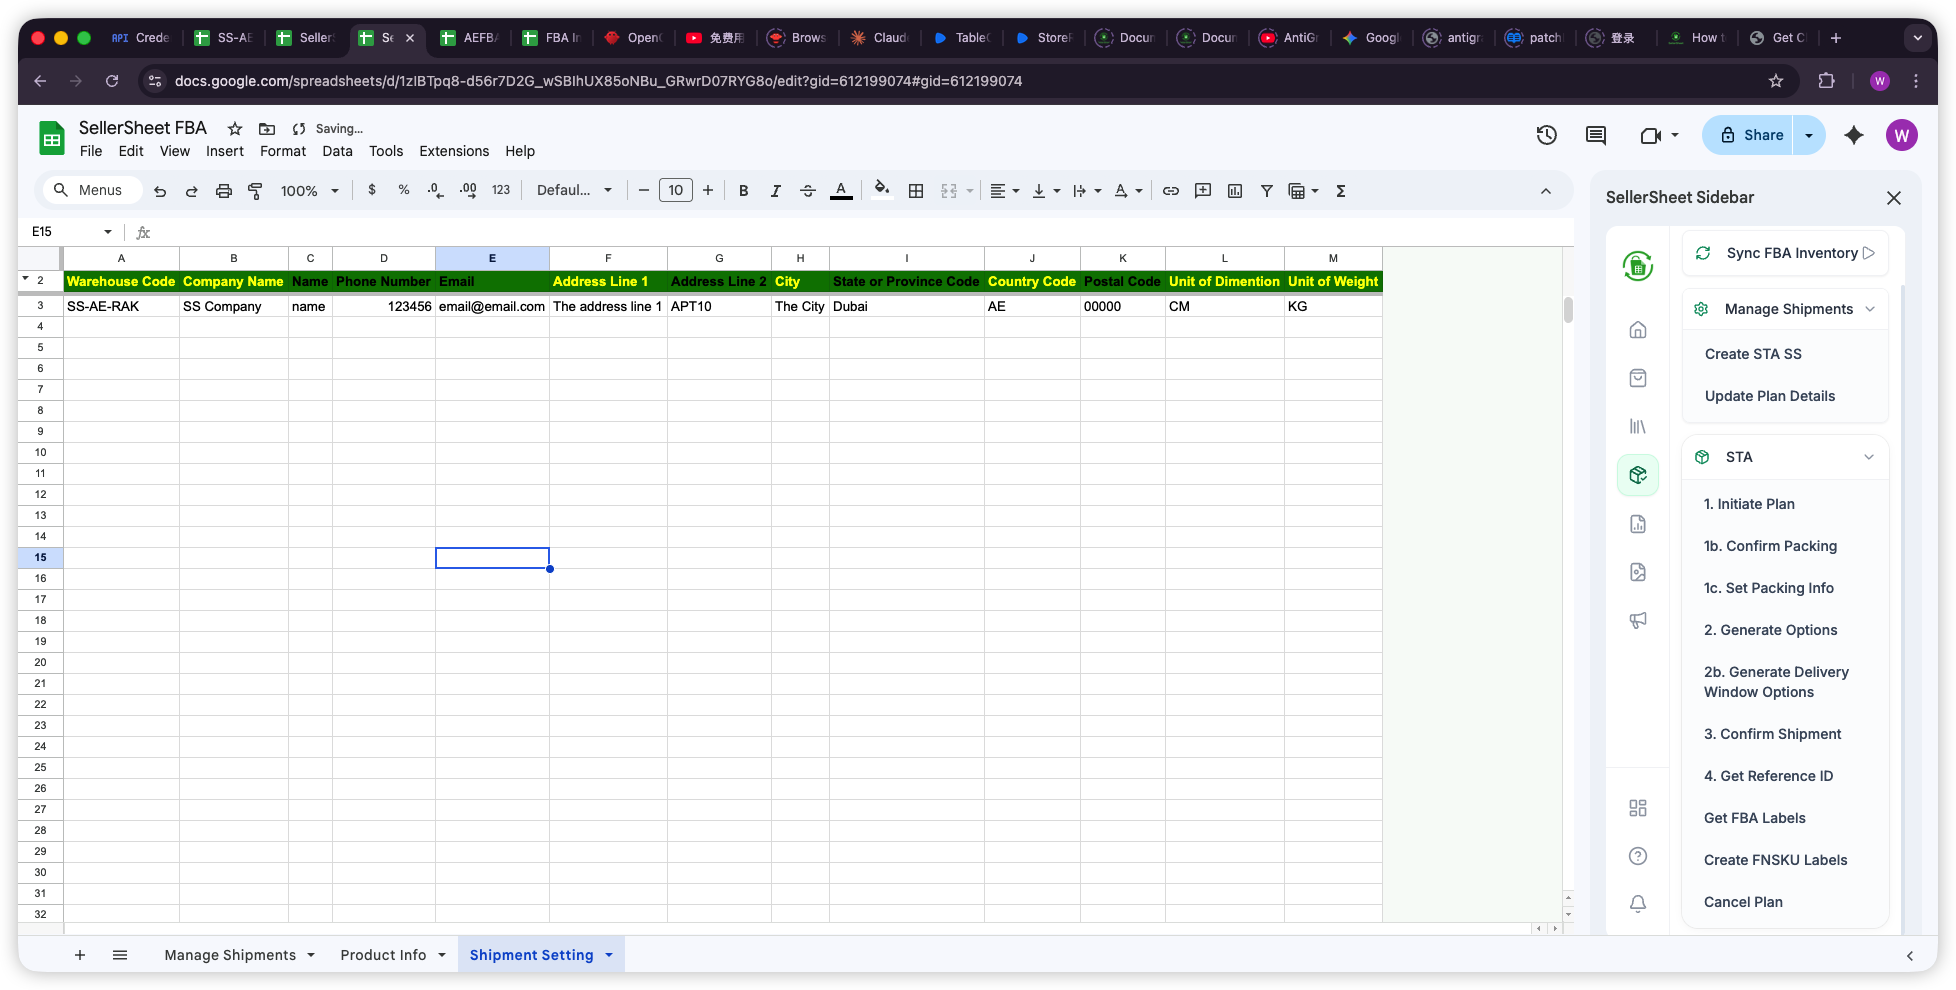
- Maintain your warehouse address book in Shipment Setting and per-SKU box specs (Qty/Box, dimensions, weight, prep) in Product Info.
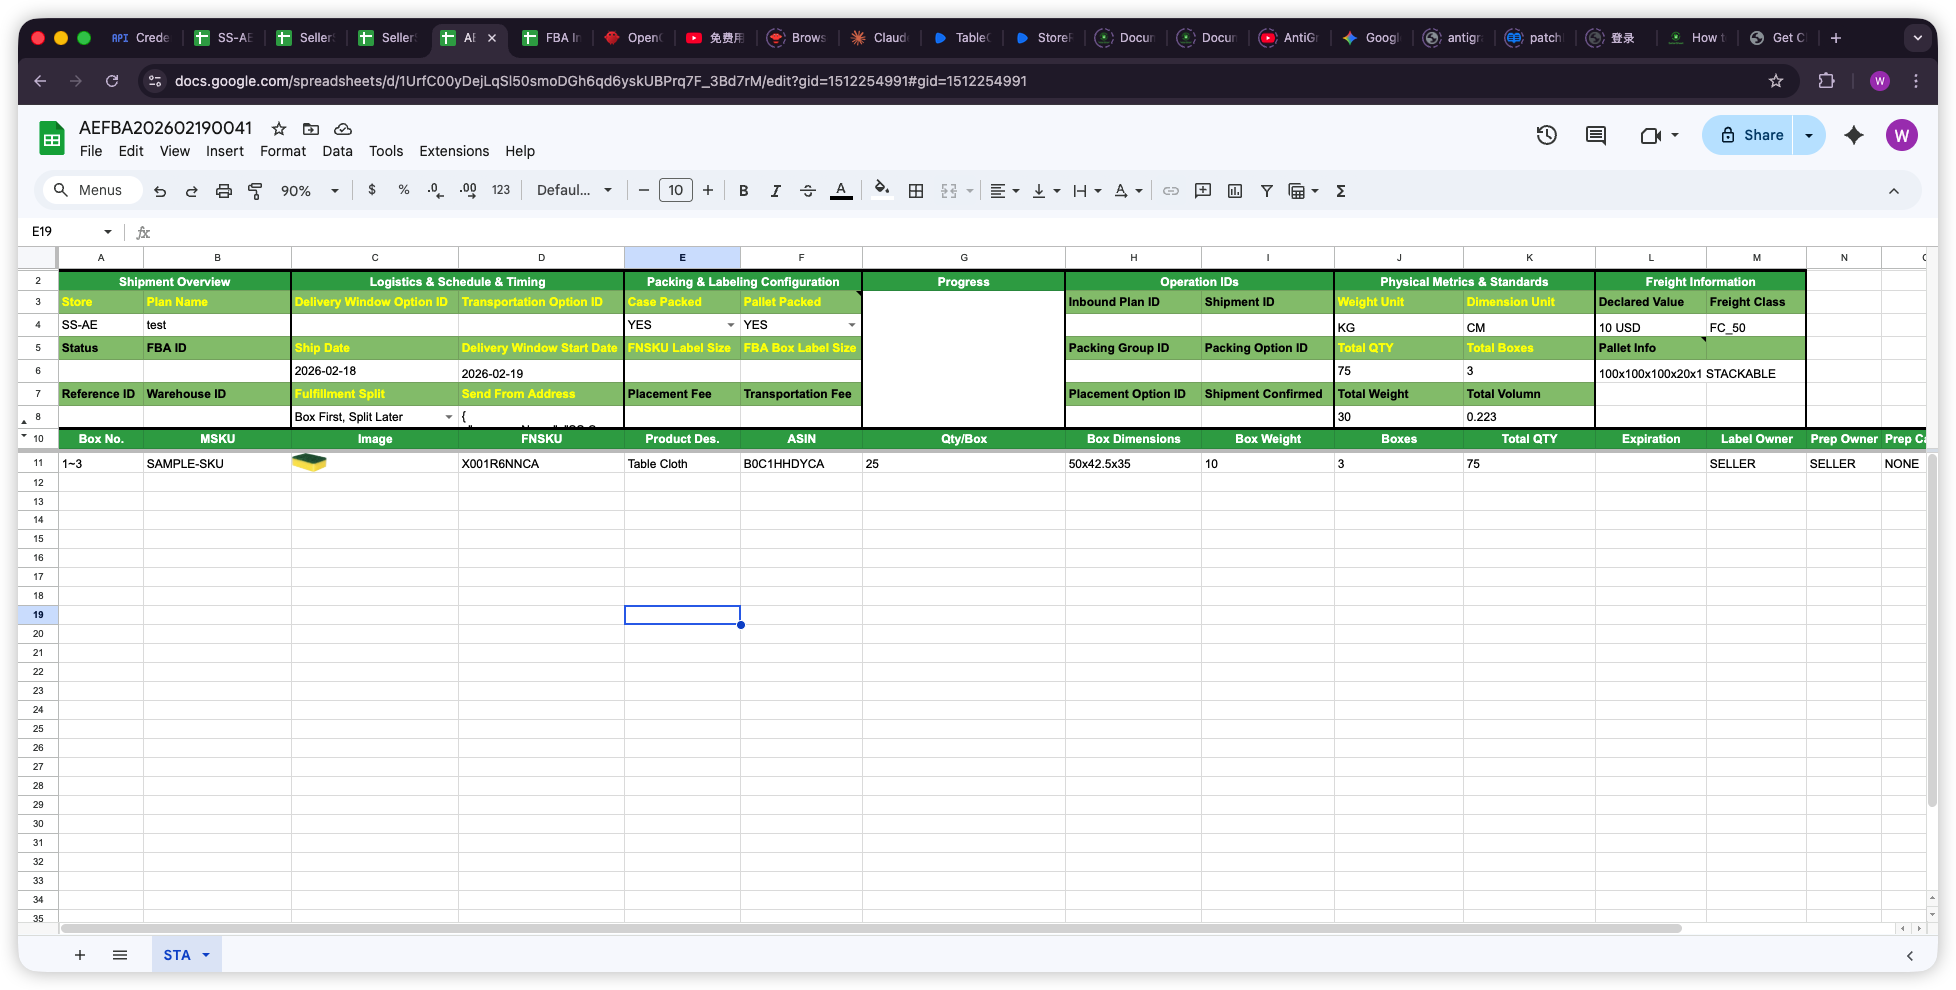
- Add a row in Manage Shipments (store, warehouse code, plan name, SKUs), click a cell in it and use Create STA SS — SellerSheet generates a dedicated STA spreadsheet for that plan.
- Run the numbered buttons in order. Box First (you know your boxes): Initiate Plan → Confirm Pack → Set Box Info → Gen Placement Opts. → pick a placement → Gen Trans. Opts. → pick carriers → Confirm Shipment. Split First (Amazon splits first): Initiate Plan → Confirm Placement (STA-Pack is generated) → fill boxes per shipment → Set Box Info → Gen Trans. Opts. → Gen Delivery Window (own-carrier only) → Confirm Shipment.
- Download FBA Box Labels and FNSKU Labels, then track progress with Sync Shipment Status on Manage Shipments.
- Browse historical plans (status, created / updated, ship-from) on the Search Inbound Plans sheet.
Tip: Ship Date must be today or later — Amazon silently returns no carrier options for past dates (SellerSheet now warns you first). Hover any header in the STA sheets for bilingual field guidance; gold headers are required, white optional, gray auto-filled.
Inventory Health Dashboard
A live, filterable view of every FBA SKU across all your stores — quantities, inbound pipeline, inventory age buckets, sell-through, weeks of cover, Amazon's recommended actions and estimated long-term storage fees, with product thumbnails. Sync FBA Data refreshes a hidden _raw_fba_data layer straight from the SellerSheet data warehouse (no Amazon API wait), and Setup Inventory Dashboard builds the Inventory Health tab: type into the filter row (store, SKU, ASIN, product name, min/max available, recommended action) and the =SQL() table re-queries instantly, with summary tiles recalculating above. Open the sidebar once in the FBA workbook to activate the SQL() function.
B2B Shipments
Manage packing lists (PL) and carton labels for B2B or direct orders.
- Upload Packing Lists via CSV
- Generate FBA/AMZ Carton Labels
- Track Shipment Status
A+ Content
Build, preview and publish A+ (Enhanced Brand Content) straight from the Create A+ sheet — one module per row, in display order.
- Fill the config row: store, locale (e.g.
en-US), A+ name, content type (EBC standard / EMC premium) and optionally an image folder name. - Pick a Module Type per row from row 5 down. The row's cell colors then show exactly what that module needs — green = required, yellow = optional, gray = unused.
- Add images by URL, or click Load Images (Drive) to place them automatically from your Drive folder (see naming below).
- Preview A+ renders the document locally before anything is sent.
- Enter the ASINs to attach, then Create & Submit — SellerSheet uploads every image to Amazon's media library, creates the document, applies the ASINs and submits for approval. Each step's result lands in the sheet.
Image file naming
Name files in your Drive folder <module>-<moduleSeq>-<imageSlot>[-anything].jpg and Load Images (Drive) places each one in exactly the right cell:
IMAGE_TEXT_OVERLAY-1-1.jpg→ the 1st overlay module's imagethree-image-text-1-2-left.png→ 1st three-image module, image 2FOUR_IMAGE_TEXT-2-3.jpg→ 2nd four-image module, image 3
Important: Drive images must be shared "anyone with the link". Files that don't match the naming pattern are reported — never placed blindly. Hover the Image headers for each module's minimum pixel size (e.g. overlay 970×300, grids 300×300).
List A+ fetches every document in your store (details fill 25 rows per click); Manage A+ ASINs replaces the full ASIN set on an existing document and resubmits it for approval.
Store Reports
Request any of Amazon's 100+ SP-API reports on demand and download them directly to Google Drive.
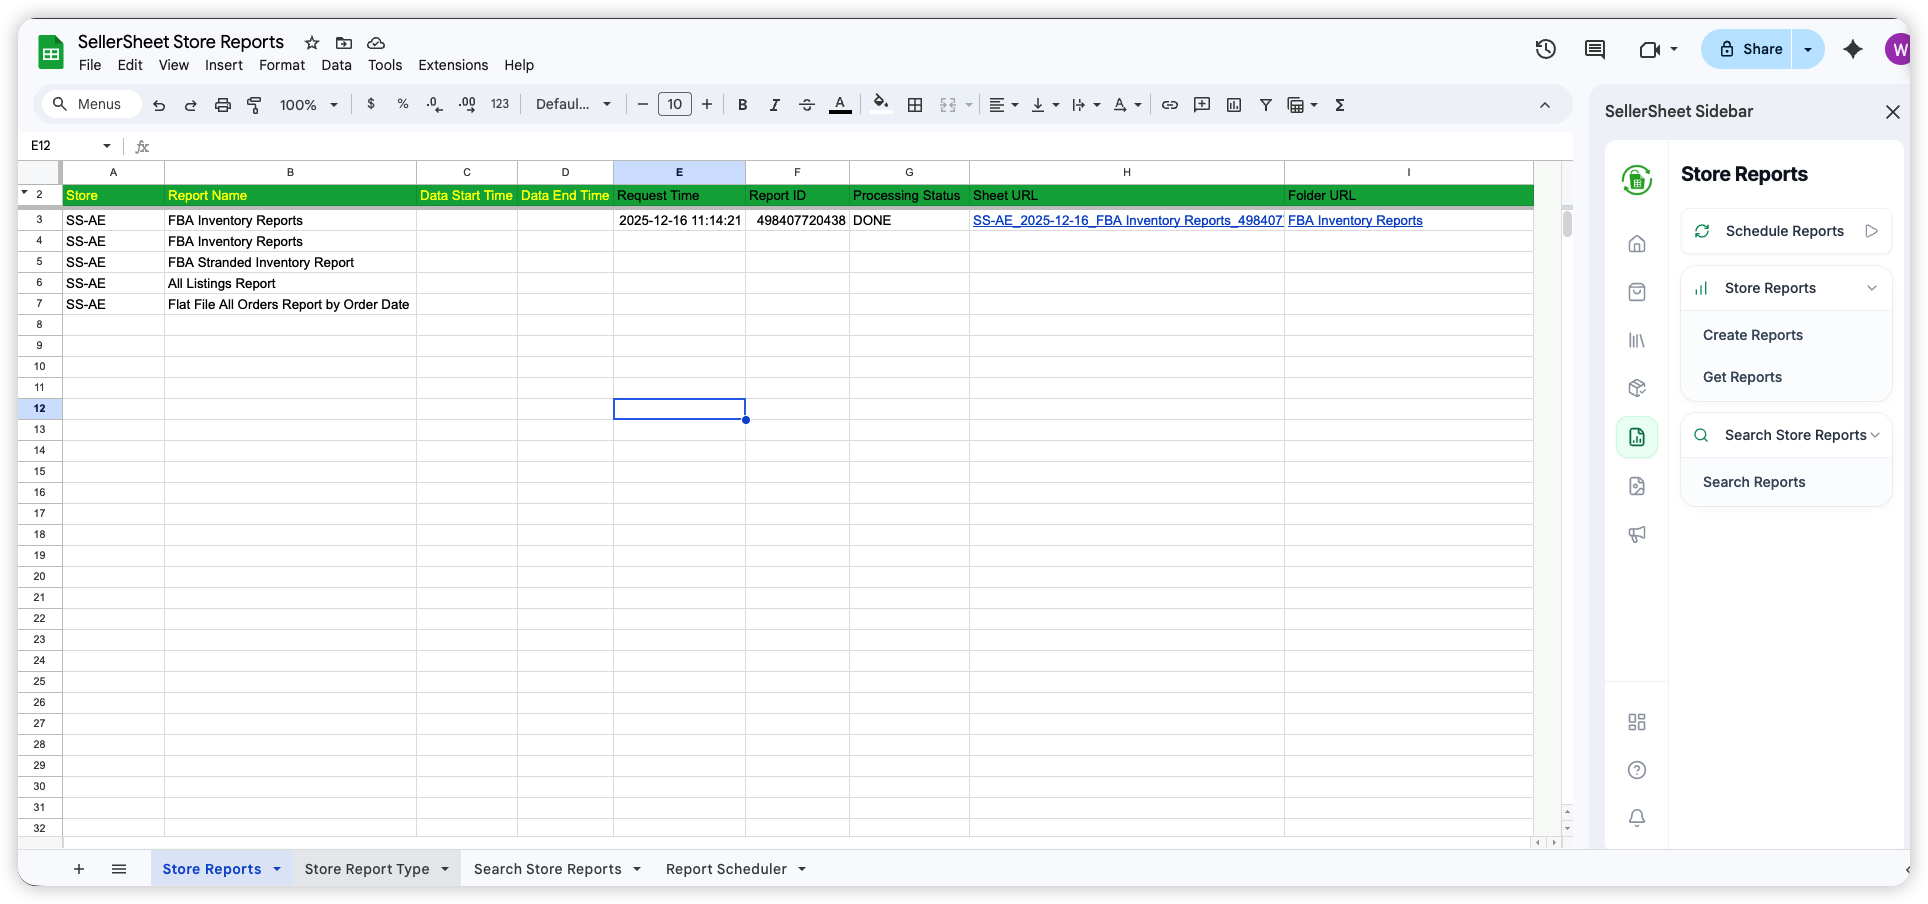
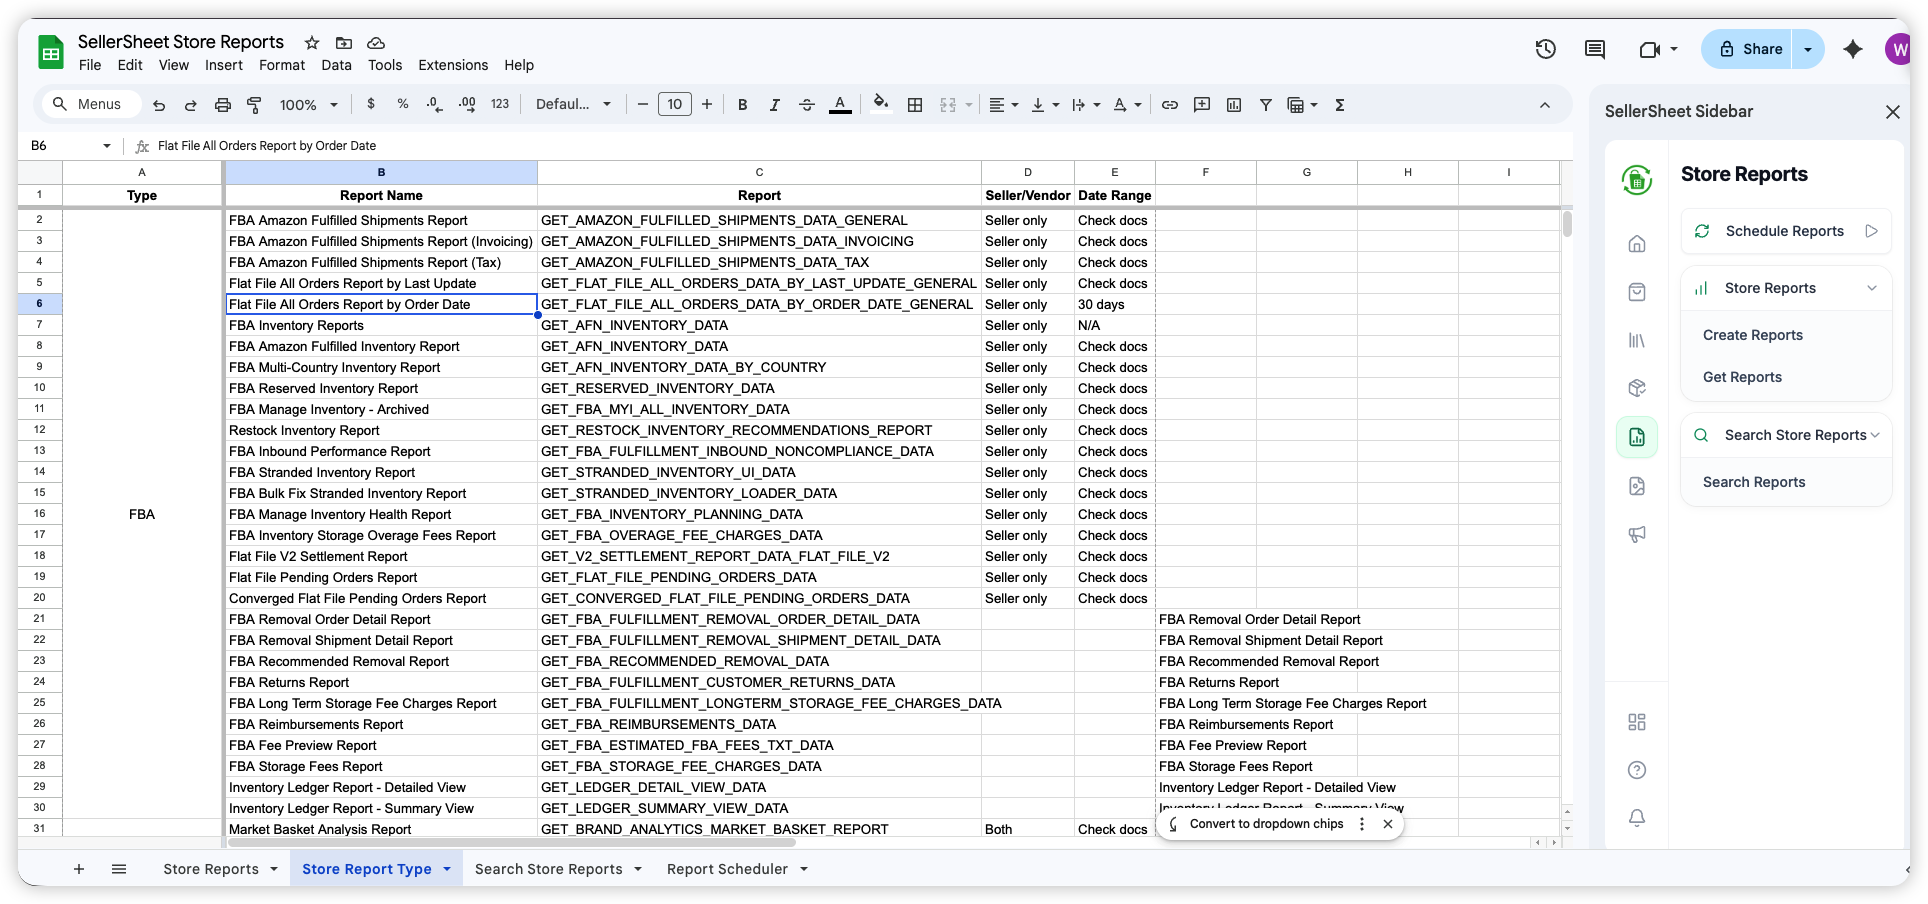
- Go to the Store Reports sheet. Enter your Store and the Report Name (copy from the Store Report Type sheet).
- Optionally set Data Start Time and Data End Time for date-range reports.
- Click Create Reports — SellerSheet submits the request to Amazon and fills in the Report ID.
- Wait for Amazon to process (usually 1–5 minutes), then click Get Reports. When ready, a clickable Sheet URL appears in the row.
| Column | Required? | What to put |
|---|---|---|
| Store | Yes | Your store identifier, e.g. MyStore-AE |
| Report Name | Yes | Exact name from the Store Report Type sheet |
| Data Start Time | Optional | Start date for reports that require a date range |
| Data End Time | Optional | End date for reports that require a date range |
Report ID, Processing Status, Sheet URL, and Folder URL are filled in automatically. Find all available report names in the Store Report Type sheet.
System Settings
Configuration for global preferences and account management.
- Workspace: Define Google Drive folder paths.
- Subscription: Manage billing and plan tiers.
- System Status: Check API connectivity health.
AI Agents (MCP)
Manage your Amazon business by talking to an AI — Claude, Cursor, Coze, Codex, OpenClaw, and more.
What is MCP?
Instead of clicking buttons in the sidebar, you connect an AI tool and describe what you want in plain language. The AI calls Amazon on your behalf, processes the data, and writes structured results directly into your Google Sheet — across multiple steps in one go. SellerSheet supports any MCP-compatible AI agent.
Example: "Pull my FBA inventory for SS-AE, find SKUs below 30 units, and write a reorder list to my Reorder sheet with current stock and days remaining." — One prompt. The AI calls Amazon, processes the data, and writes the sheet automatically.
Connect Your AI Tool
Add https://sellersheetai.com/mcp as a remote MCP server in your AI tool. The first time you run a SellerSheet command, a browser tab opens for one-click Google authorization — no API key to copy manually.
Claude Code
claude mcp add --transport http sellersheet https://sellersheetai.com/mcp Full setup guide →Codex & OpenClaw
Add https://sellersheetai.com/mcp as a remote MCP server in settings
What AI Can Do
| Domain | Example multi-step task | Writes to your sheet |
|---|---|---|
| Sales analysis | Compare last 30 days vs previous 30 days by ASIN, flag declining products | Dashboard sheet — ASIN, revenue, units, % change |
| Inventory | Find all FBA SKUs below reorder threshold, estimate days of stock remaining | Reorder sheet — SKU, ASIN, current stock, days remaining |
| Ads | Pull all SP campaigns, calculate ACOS per campaign, flag anything above 30% | Ads Analysis sheet — campaign, spend, sales, ACOS, flag |
| Listings | Sync live listings, find any missing bullet points or fewer than 3 images | Fix Needed sheet — ASIN, title, missing fields |
| Reports | Download last week's All Orders report, extract and rank revenue by ASIN | Sales Summary sheet — top 10 ASINs by revenue |
Example Prompts
Copy these prompts directly into your AI tool. Replace SS-AE with your store identifier.
Inventory reorder analysis
Check FBA inventory for SS-AE. Find all SKUs where stock is below 30 units.
Write them to the Reorder sheet with columns: SKU, ASIN, Current Stock, Days Remaining.
Writes to: Reorder sheet — SKU, ASIN, Current Stock, Days Remaining
Sales comparison (30-day vs prior 30-day)
For SS-AE, compare sales for the last 30 days vs the 30 days before that.
Break it down by ASIN. Write a summary table to the Dashboard sheet
with columns: ASIN, Title, Last 30 Days Revenue, Previous 30 Days Revenue, Change %.
Writes to: Dashboard sheet — ASIN, Title, revenue comparison, % change
Ads efficiency audit
Pull all active Sponsored Products campaigns for SS-AE.
Calculate ACOS for each campaign. Flag any campaign where ACOS is above 30%.
Write the full list to the Ads Analysis sheet sorted by ACOS descending.
Writes to: Ads Analysis sheet — Campaign, Spend, Sales, ACOS, Flag
Listing health check
Sync live listings for SS-AE. Find any listings missing bullet points or with fewer than 3 images.
Write them to the Fix Needed sheet with columns: ASIN, Title, Missing Fields.
Writes to: Fix Needed sheet — ASIN, Title, Missing Fields